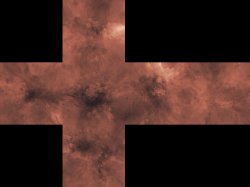
I have managed to make a full skin with 24 custom textures, I used the image below.
Looks good enought by now, we are progressing a lot in the last days
")
Some btws...
The deformation pattern i posted (and later you used for a test) is not accurate enought... is very close though but the curvature of the lines is not exact
We should think in it as the latitude and longitude lines everybody is used to... that lines should be perfectly straight all around the sphere
There are only some of them that are naturally aligned with each others, because how the "tiles" are cropped, it can be seen very well in your first tests... are the lines that passes throught the centers of all the "quarters"
As example... the 2 lines that crosses on top of the ice of the south pole.... that ones are perfectly straight all around the sphere when displayed in the PS3
the same happens with the "equator" line (on top of peru)
For this kind of tests is good to add the custom images in the "clouds" layer... just because are going to be displayed together with the "ground" and "specular" so you can use the terrain as reference
But in some of the mods you are doing this is betraying you, you should add the custom images in the ground layer
The problem is the "specular" images are creating reflections (with the shape of the terrain) and the "clouds" is not fully opaque... so you can see the reflections are visibles throught your custom images, this is breaking them :/
What you could do is to create a base earth.qrc with all the specular images in fully black (to disable the reflections)
And from that point use that .qrc for your mods but injecting your custom images in the "ground" layer
Most of the ideas we had doesnt really needs reflections... in the official earth the reflections are used in the places where is water, but none of the custom mods that has been discussed here have water
Actually... is better to think in the reflections generated by the "specular" images as a feature that we dont need
Sure... if at some point we have full control of all this and someone wants to invest time in them i guess could be used to create cool efects (like reflections in the edges of metals, or glass), but by now is better to forget about them
Also, as mentioned before, the "specular" images needs to be created after you have the ground images ready... so is an "extra" feaure and you should worry about them only at the end (after you have your "ground" images ready)
The way to create the "specular" images is easy, you just need to take your "ground" images and reduce the colors to black and white scale, and play a bit with the brightness/contrast controls... this is going to create an image in black and white with soft edges
Maybe there is a setting inside an .mnu file to disable the specular reflection effects though... it would not surprise me if it exists, because this problem we are having should be a problem for them too

---------------------
And finally... have you tryed to find in the .mnu files if there is a setting to change the height of the clouds layer ? (distance in between the clouds and the ground)
If this exists is going to be a very good hack, use your imagination
We could make that idea i mentioned of a satellite network... or space stations ... of alien spaceships
Actually you can paint a space battle in it, lol
Also, keep in mind for some planets (different than earth) there are no clouds... so initially you dont need it, but you have that layer free to use it for whatever you want (maybe you just want to use the whole clouds layer to paint a single object in a small point of it, this should look realistic)
Edit:
I mean... you can increase the height of the clouds layer a lot... then replace all the cloud images by fully black images... except one of them that have an tiny image of the ISS
https://en.wikipedia.org/wiki/International_Space_Station")