PS3 (Research/Experimental) - NEC/TOKIN Capacitors Replacement - YLOD

That seems to be about the same amount of time as mine! Here's another thing i noticed while tinkering with the tests -- when my system first died, and before I made any modifications, it would power on, get a ylod, then start blinking red. At that point, it would become completely non-responsive and none of the buttons would do anything until I flipped the switch in the back.

Now, however, when it goes into ylod it still sits there blinking, but if i touch the power button, it actually stops blinking. It still goes into ylod if i push the power button again, and if I push the eject button it still gives me the 3 beeps and nothing happens. So is my device in a different state now than before?

I can't say I've ever had my buttons unresponsive like you describe. But I was able to hit the power button again to stop the blinking red light and if I were to press the eject button I would get three beeps. Correct me if I'm wrong but I don't believe the A01s had the ability to perform the fan "test" where you hold the eject disc button down for so many second and the fan goes crazy. I think that started on the G01 models but I'm sure someone in this thread knows for sure.

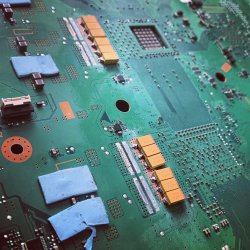
I can't remember what kind of YLOD my system had back in 2012 but I can tell you my most recent one before replacing the first Nec was in game playing Metal Gear Solid 4. Once it crashed it had the YLOD in my video. After replacing 1 Nec it worked fine then crashed playing GTA IV but I was able to turn it on right away and play COD4 for a couple of hours. The next day it booted fine then crashed as soon as I loaded GTA IV. Then it had the same YLOD.

So really time will tell with this. All I can say is I've been booting it up every day and playing for 2 to 3 hours on it ever since I replaced all of the Tokins. No issues. Handles the last of us fine. Would like to get my hands on Gran Turismo 6 at some point but I didn't realize how pricey it was! Any suggestions of other good benchmark games would be appreciated. I do have GTA V but I haven't gotten around to it yet. Been having too much fun playing Dead Space and the original Kingdom Hearts. [emoji23]


Sent from my iPhone using Tapatalk
 
Yeah, I was browsing the psxdevwiki and confirmed that the cecha01 models don't have the fan test. But for sure I was not able to get it going until I flipped the switch.

The way mine died was odd too - I was playing a ps2 game that I had ripped, and temps weren't high! At least, not super loud, it seemed pretty average. I had to go somewhere, so I just powered down the console in the middle of the game by pushing the home button and selecting shutdown the console. Next time I turned it on, a few hours later, it was ylod. So I wasn't playing anything intense or taxing, it was just xenosaga 2, and it powered down just fine, it didn't hang, beep or do anything to indicate it had failed....
 
Hiya, i too was trying with some small size B caps like yours (mine were 470uF - 2.5V), also tried adding some 10uF - 25V MLCCs (see photo) but had no success.

I tried just doing the RSX 1st but still had YLOD, then tried doing the CELL same way as seen in the photo, but no joy. Then i tried without any MLCCs and only had 4 x 470uFs per NEC/Tokin replacement, which was all of them in the end, on both sides, for both RSX & CELL, but still had YLOD.

So i've ordered some size D Panasonic caps in the meantime and desoldered everything. I also have some 470uF 6.3V AVX type around the house that i could try while waiting for the Panasonics to arrive, all being well. I need to replace the bridge wires anyway.

I might have missed the post, but i don't think i have seen a success story using the smaller size B caps yet, seems most / all success stories are with the size D caps. Although it shouldn't make a difference, but maybe there is a tradeoff.

Will aim to update when trying with other caps and larger gauge bridge wires soon, all being well.


View attachment 25665

ive been watching very closely with the B case types as i originally tried these too with no success yet but on page 85 is the only success story so far with these which is the same as urs so it does give me and mayb urself now some more hope that these were not the issue.
 
Yeah, I was browsing the psxdevwiki and confirmed that the cecha01 models don't have the fan test. But for sure I was not able to get it going until I flipped the switch.

The way mine died was odd too - I was playing a ps2 game that I had ripped, and temps weren't high! At least, not super loud, it seemed pretty average. I had to go somewhere, so I just powered down the console in the middle of the game by pushing the home button and selecting shutdown the console. Next time I turned it on, a few hours later, it was ylod. So I wasn't playing anything intense or taxing, it was just xenosaga 2, and it powered down just fine, it didn't hang, beep or do anything to indicate it had failed....
Pretty wierd, huh? You should try the common tantalum caps people used here, to see if there's any changes. I don't think that little ceramic cap you missed will give you any problems, so you should focus on the NEC part. Both videos shows identical YLOD, and those for me are instant, so it's pretty tricky to know which is the problem here, even if you never touched the mobo. From what you mention, I believe the issue could be in somewhere else though :/
 
I think what I'm going to do next is what I should have done first -- get a scope reading and compare with @squeept 's results. I'm thinking/hoping I'm going to get readings similar to his "good" gpu and cpu.

I've already checked all the fuses on the bottom side, and I don't think there are any top side, but I'm going to double check that.

There's also an interesting paragraph in the psdevwiki (https://www.psdevwiki.com/ps3/Boot_modes#Fan_test)

YLOD[edit]
YLOD - Yellow Led of Death (Flashes Green, Yellow then Red)

Failure in the hardware_init stage. Suspects: RSX, CELL BE, XDR Ram, GDDR Vram, Syscon, South Bridge , Starship2 (if NAND SKU), NAND/NOR Flash, Power Supply, Fuses, Regulators, Cooling/Fan
If you ground out tristate on a (?NOR only?) console with YLOD, it would GLOD instead if it is caused by bad flash (or content of flash). This makes it an easy way to check if the YLOD is flash caused (most common) or RSX caused (second most common).

My 60gb was running on cfw. Maybe something was corrupted during shutdown? I hate conjecture without evidence, but I am fairly new to ps3 cfw, so I don't know what the likehoods are.
 
Hey everyone,
I followed this during the last couple of days and I think it is really interesting how the whole YLOD story evolved now...
Personally I now fixed 2/4 PS3 with this. The other 2 were so severely damaged because of delid tries or bad YLOD repairs BEFORE, there was nothing to gain unfortunately.

I only replaced the Caps on the backside with 3 x 470uF caps each.
By simple maths this should be 1410uF in total per NEC/TOKIN, so if the caps on the other side start failing as well this replacement should cover at least 210uF loss per NEC/TOKIN.
Also I used a fiber brush pen to scratch away a little bit of the vias in the middle to align the Caps a little bit better (see image attached).

is there any reason to do it differently?

regards
 

Attachments

  • 6F762D17-D33A-40E8-9095-51988597FEA1.jpeg
    6F762D17-D33A-40E8-9095-51988597FEA1.jpeg
    1.3 MB · Views: 185
Last edited:
Hiya, i too was trying with some small size B caps like yours (mine were 470uF - 2.5V), also tried adding some 10uF - 25V MLCCs (see photo) but had no success.

I tried just doing the RSX 1st but still had YLOD, then tried doing the CELL same way as seen in the photo, but no joy. Then i tried without any MLCCs and only had 4 x 470uFs per NEC/Tokin replacement, which was all of them in the end, on both sides, for both RSX & CELL, but still had YLOD.

So i've ordered some size D Panasonic caps in the meantime and desoldered everything. I also have some 470uF 6.3V AVX type around the house that i could try while waiting for the Panasonics to arrive, all being well. I need to replace the bridge wires anyway.

I might have missed the post, but i don't think i have seen a success story using the smaller size B caps yet, seems most / all success stories are with the size D caps. Although it shouldn't make a difference, but maybe there is a tradeoff.

Will aim to update when trying with other caps and larger gauge bridge wires soon, all being well.


View attachment 25665
That is very nice work! , I to have run into doing all tantalums, on a few consoles, and had success, only one so far would not boot CECHB01 with all TOKIN'S replaced. So I did a reflow with heat gun station and flux, I used a syringe to inject the flux under all chips that have solder balls even the memory chips and to my surprise the console booted and has run perfect since. Crossed fingers, I also left it run with music running for 2 weeks.it has been my main console for games right now. Because if it takes a shit . It was a reflow. So I'm not comfortable thinking it will last. So to save my good consoles. :grenade:
 
Last edited:
There's something you and many people are overlooking. What kind of YLOD you have?

Are you sure you're not having a short somewhere? The YLOD in its original state was instant or slow? In my experience, if the YLOD is slow, the fix is straightforward. Can you perform the fan test? On most PS3 with delayed YLOD you can activate it, on shorted PS3 you should not. I'll recommend you to see the RSX caps' state, if they are shorting or not, or if you made a delid, check if you didn't damage any die.

P/S: Pretty clean and pro job on that mobo

Hiya, good question ElGris, well after seeing the recent video from @cfreddykrueger (just after your question), i would say it's exactly the same as in cfreddykrueger's video. The YLOD starts at about 1-2 secs. Yep the fan test seemed to work fine, before and after replacing all NEC/Tokins.

I think you're right, there could be a short somewhere, because the contacts on those small size B caps aren't very far apart, so it could be the solder is making contact (bridging) where it shouldn't under the caps.

This is why, since that photo, i de-soldered everything so i could try with some size D caps like 99% of other people's success stories here. Also, after chatting with you guys about what AWG size you used for bridge wires, i decided to order some 16 AWG soild copper and see how that goes.

Will aim to update again soon, just have to wait for parts to be delivered, hopefully this week. :D
 
That is very nice work! , I to have run into doing all tantalums, on a few consoles, and had success, only one so far would not boot CECHB01 with all TOKIN'S replaced. So I did a reflow with heat gun station and flux, I used a syringe to inject the flux under all chips that have solder balls even the memory chips and to my surprise the console booted and has run perfect since. Crossed fingers, I also left it run with music running for 2 weeks.it has been my main console for games right now. Because if it takes a shit . It was a reflow. So I'm not comfortable thinking it will last. So to save my good consoles. :grenade:

That's great to know, yeah i was thinking like you did - if after trying with larger bridging wires, and using the bigger caps (size D) i still have YLOD, then i would also try de-lidding and doing a reflow on the CPU + GPU + Ram chips, just to rule anything out and see what results i get.
 
Last edited:
ive been watching very closely with the B case types as i originally tried these too with no success yet but on page 85 is the only success story so far with these which is the same as urs so it does give me and mayb urself now some more hope that these were not the issue.

Hiya @wrx884, yep indeed, you are right, on page 85 by jupiterstar with his smaller size B caps. He ended up using large bridge wires:- 14 awg, but before that jupiterstar had no success using 22 awg, they even burnt out.

Same as with mine, i used small 22-23 gauge wire for bridging and still had the YLOD, i didn't get any burnt wire marks, but i did have 6 x bridge wires on RSX and the same for CELL so it prolly helped distribute the current.

I have ordered some 16 awg soild copper wire, to see if that helps, will update with results this week / next week all being well.

What about you @wrx884, what size bridging wires have you used / thinking of using?

Yep so the wires were a separate issue from the tan caps themselves tho so just to make that clear.

Really we probably need to know if they are still working as we haven't heard any updates yet so mayb thats important.

Im not sure what gauge wire im using exactly but i bought some figure 8 wire that was for another job so just using what i have on hand but its rated at 50V 5A. consists of 50 strands x 0.12mm. this is more than enough.

@jupiterstar any chance u can update on the consoles??
 
I might have missed the post, but i don't think i have seen a success story using the smaller size B caps yet, seems most / all success stories are with the size D caps. Although it shouldn't make a difference, but maybe there is a tradeoff.
View attachment 25665

ive been watching very closely with the B case types as i originally tried these too with no success yet but on page 85 is the only success story so far with these which is the same as urs so it does give me and mayb urself now some more hope that these were not the issue.

With 'scope verified problem and solution, I've used the little B case fellas just fine. I think I even independently picked out the exact same ones from Mouser that wrx posted awhile back.

When I did the tests to see if different voltages / capacities affected anything, one of the larger cases didn't work for me. I'm wondering if maybe tantalums just don't have the greatest quality control, and since you have to use so many it's easy to end up with a single bad one in the bunch... add it to the pile of reasons to get a scope.

Wire gauge and style shouldn't matter beyond not catching on fire. I use 2x stranded 26 AWG per chip. https://www.powerstream.com/Wire_Size.htm

The skin stuff shouldn't come in to play here since it is DC, but I really don't know since there is a small amount of high frequency component to it due to switching.
 
Last edited:

You laugh, but I have this masterpiece hanging on the wall in my shop:
o1AIvRk.jpg


It's difficult to see in the picture, but roughly 50% of the entire surface area of the board is delaminated and bubbled up from the time it spent in an oven and then got heatgunned. This was from a repair shop I bought out when they closed. Someone was charged money for this.
 
Yep so the wires were a separate issue from the tan caps themselves tho so just to make that clear.

Really we probably need to know if they are still working as we haven't heard any updates yet so mayb thats important.

Im not sure what gauge wire im using exactly but i bought some figure 8 wire that was for another job so just using what i have on hand but its rated at 50V 5A. consists of 50 strands x 0.12mm. this is more than enough.

@jupiterstar any chance u can update on the consoles??

Thanks mate, most appreciated. Seems you used more than enough gauge. Yep would be interesting to hear an update from jupiterstar, to see how his size B caps are still getting along.
 
Last edited:
You laugh, but I have this masterpiece hanging on the wall in my shop:
o1AIvRk.jpg


It's difficult to see in the picture, but roughly 50% of the entire surface area of the board is delaminated and bubbled up from the time it spent in an oven and then got heatgunned. This was from a repair shop I bought out when they closed. Someone was charged money for this.

Is that Blu-Tak ? :pirate:
 
With 'scope verified problem and solution, I've used the little B case fellas just fine. I think I even independently picked out the exact same ones from Mouser that wrx posted awhile back.

When I did the tests to see if different voltages / capacities affected anything, one of the larger cases didn't work for me. I'm wondering if maybe tantalums just don't have the greatest quality control, and since you have to use so many it's easy to end up with a single bad one in the bunch... add it to the pile of reasons to get a scope.

Wire gauge and style shouldn't matter beyond not catching on fire. I use 2x stranded 26 AWG per chip. https://www.powerstream.com/Wire_Size.htm

The skin stuff shouldn't come in to play here since it is DC, but I really don't know since there is a small amount of high frequency component to it due to switching.

Thanks for reply and info @squeept, well it was because of your scope test photos, using those small size B caps, that made me go and buy some lol :D I already had the AVX size D ones, but when i saw how well those size Bs fit on your test board, i was like "i gotta get myself some of those!" :welcoming: :hypnotysed:

The only thing for me i think, is that those size Bs have such small gaps underneath between the contacts that when i soldered them in, i might have bridged the (+) and (-) :rolleyes:

That's why i want to re-do it again using size Ds. Then i can feel assured there's no solder bridging going on underneath. I de-soldered everything, ready for re-doing, i put some Kapton tape down on the negative pad strips just to be sure, then aiming to solder to the negative vias instead (as in photo) ...then i can rule stuff out if it's still giving me a YLOD after.

PS3_caps_desoldered.JPG
 
Last edited:
You laugh, but I have this masterpiece hanging on the wall in my shop:
o1AIvRk.jpg


It's difficult to see in the picture, but roughly 50% of the entire surface area of the board is delaminated and bubbled up from the time it spent in an oven and then got heatgunned. This was from a repair shop I bought out when they closed. Someone was charged money for this.
I see a COK-001 board being abused, i cry, you US lads are so lucky to have these, Sony screwed us Europeans big time, and i still hold them accountable for that [emoji23]

Is that some 3M Clay stuff? Reminds me when people used to reflow these in the oven by covering the Capacitors with 3M Clay and Aluminium Foil [emoji23]

Sent from my G8141 using Tapatalk
 
Thanks for reply and info @squeept, well it was because of your scope test photos, using those small size B caps, that made me go and buy some lol :D I already had the AVX size D ones, but when i saw how well those size Bs fit on your test board, i was like "i gotta get myself some of those!" :welcoming: :hypnotysed:

The only thing for me i think, is that those size Bs have such small gaps underneath between the contacts that when i soldered them in, i might have bridged the (+) and (-) :rolleyes:


If ur flush mounting them fine theres heaps of room to not bridge the B cases. For ur own curiosity simply flip them over and line them up with the pads on the mother board and u will see u should have no issues soldering these.
 
I went back this morning, reflowed my tantalums and tidied things up... or so I thought! I put everything together and got an instant ylod! It was so fast, i don't think it was even half a second before it died, and i never had that before. Sounds like I shorted something :)

In view of all that, might I suggest we rename things? Instead of delayed/fast/slow/etc boots, it sounds to me it's either instant ylod or not-instant ylod. That doesn't necessarily roll off the tongue, but to me it leaves a lot less room for ambiguity...
 
If ur flush mounting them fine theres heaps of room to not bridge the B cases. For ur own curiosity simply flip them over and line them up with the pads on the mother board and u will see u should have no issues soldering these.

Yeah you are totally on point, and i thought to do that when i was soldering them in, and after too, just to check they were correctly positioned / aligned because i was worried at the time they were slightly off center. Also when i was soldering them in they would move slightly, and it only takes them to move out of position a little bit to then potentially make contact with the other side.

If someone is soldering size B caps using solder wire, then i'm sure the risk isn't very high to create a short under the caps. But for me i used solder paste and it doesn't take much for the paste to touch both sides at melting point and join as one solder, because of the capillary effect, and also it's easy to add too much paste sometimes (at least for me lol) then it ends up joining both sides when it melts.

And with 64 solder points like that (32 Tans x 2 solder points each), there is more room for a mistake short circuit when using size B caps (at least for me anyway using solder paste). So when using size D caps, if there is still a YLOD after full replacement, then i would be able to check better if it's due to a short on 1 of the caps, or not, because the gap between the (+) and (-) under the the D size caps is fairly large.
 
Back
Top