Gabriel2Silva
Member
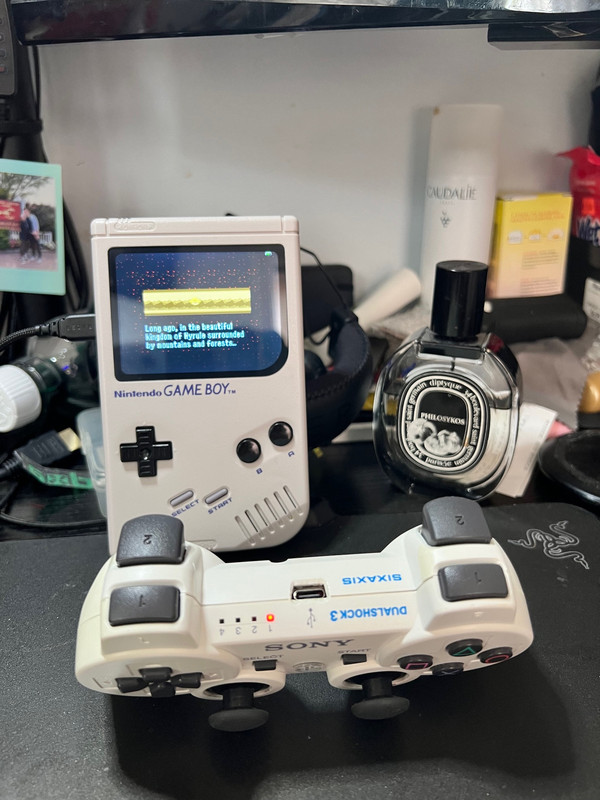
Hey guys. Recently I asked here about the USB pinout on the DualShock 3 controller so I could mod a USB-C port on it, well, turns out I managed to do it. Here's a quick tutorial on how to do it:
I'd say this is a 4/10 difficulty mod, you'll need basic to moderate soldering skills. The worst part IMO by far is desoldering the old mini USB port.
Requirements:
Disassemble your controller by removing the screws on the back. If you have never disassembled a DualShock 3 before, it can be kinda tricky because of the L2/R2 buttons, but it is not a hard job to do. Watch a YouTube video on the subject, it helps a lot.
Remove the battery from its socket. Desolder the two vibration motors from the board. They are connected by 2 wires, just desolder these two points and they're gone. This is not required, but it will make your life 1000x easier because the motors won't be there hanging while you do the mod. If you're unable to desolder the motors, then you probably don't have the soldering skills to do this mod.

Desolder the old mini-USB port. This is, in my opinion, by far the hardest part. De-soldering didn't work for me. I've tried applying new solder, using a desoldering wick, using a heat gun, using every tool at my disposal, NOTHING worked. So I resorted to destroying it with the nose-needle pliers. This is not the recommended way, mind you, 'cause you don't want to destroy a perfectly working port, but if it is already non-working or broken like mine was, then go for it. After desoldering it, clean the pads and remove all the excessive solder.
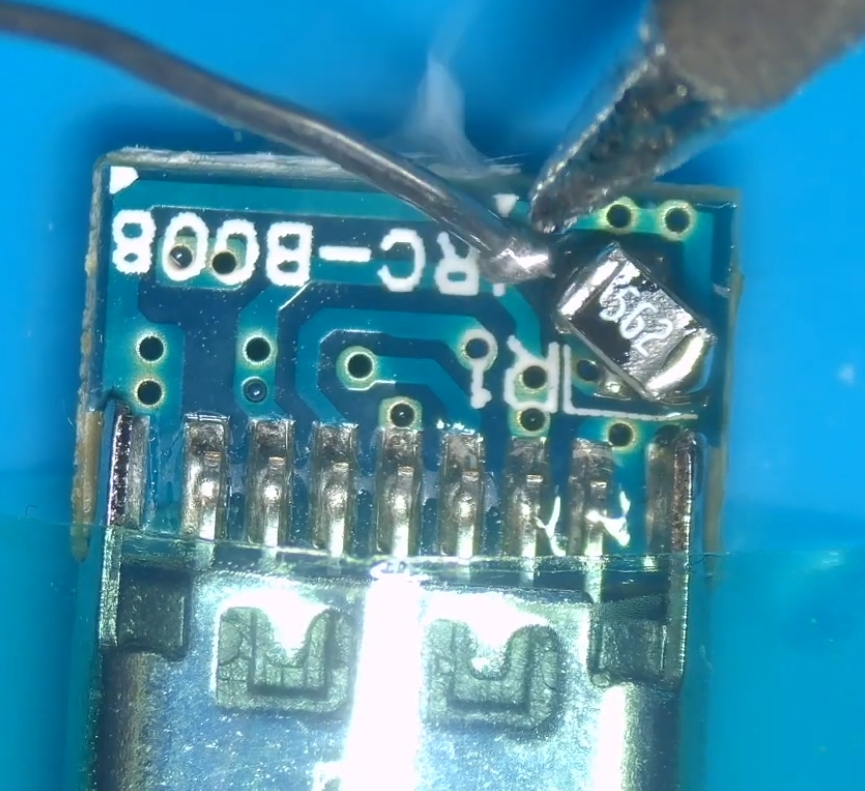
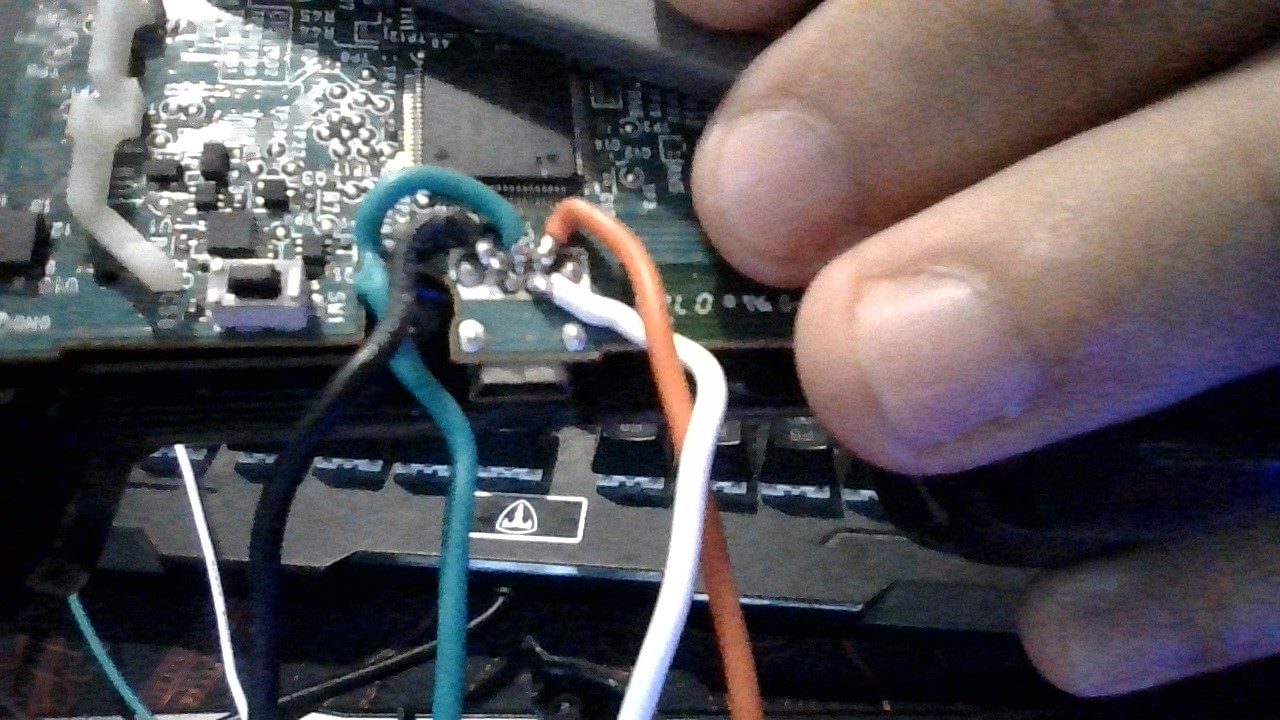
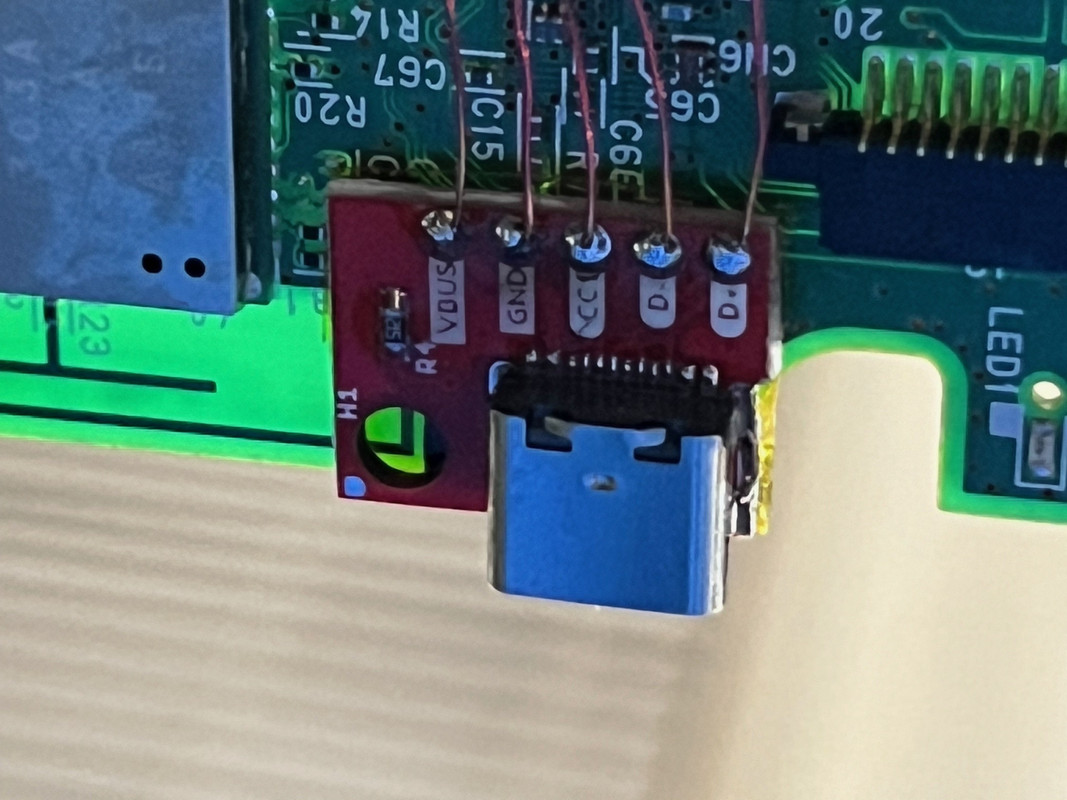
Solder four wires to the USB-C breakout board. Use a small amount, you don't need a lot of wiring for this mod, a couple centimeters will do. After that, you'll solder the other end of these wires to these points on the DualShock 3 board:

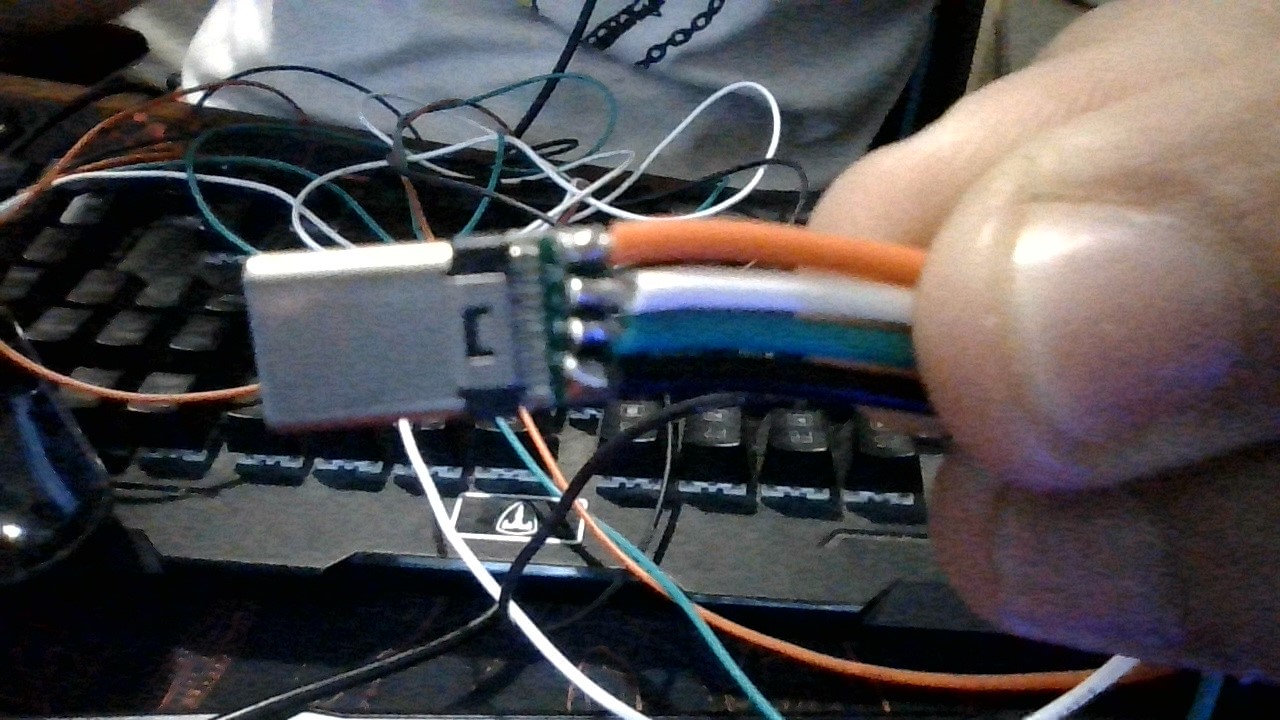
Use some electric tape to isolate the connections.
The USB-C port is slightly larger than the mini-USB port, so you'll need to remove some excess plastic on the DualShock 3 shell, the back side of it. With nose-needle pliers and being careful, you can make it look original. Handle it with care and it'll definitely not look destroyed. You can simply remove this part with the pliers and it'll come out pretty easily:

Find a way to fix/stick/mount the USB-C port to the board, on the other side of the USB port pins, exactly where the old port was. You don't have the mounting holes anymore, so you'll have to be creative. You can just tape it down in place with electric tape, but in my experience it was not strong enough for a USB port, so I just ended up using superglue. Super glue can be removed easily with acetone if someday you decide to replace the USB port again.
Connect the battery and then test the controller and its new USB port. If it is working, you're done! Just solder the vibration motors back in place and then reassemble the controller. That's it!
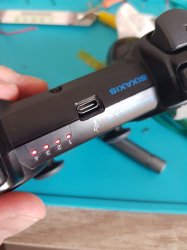
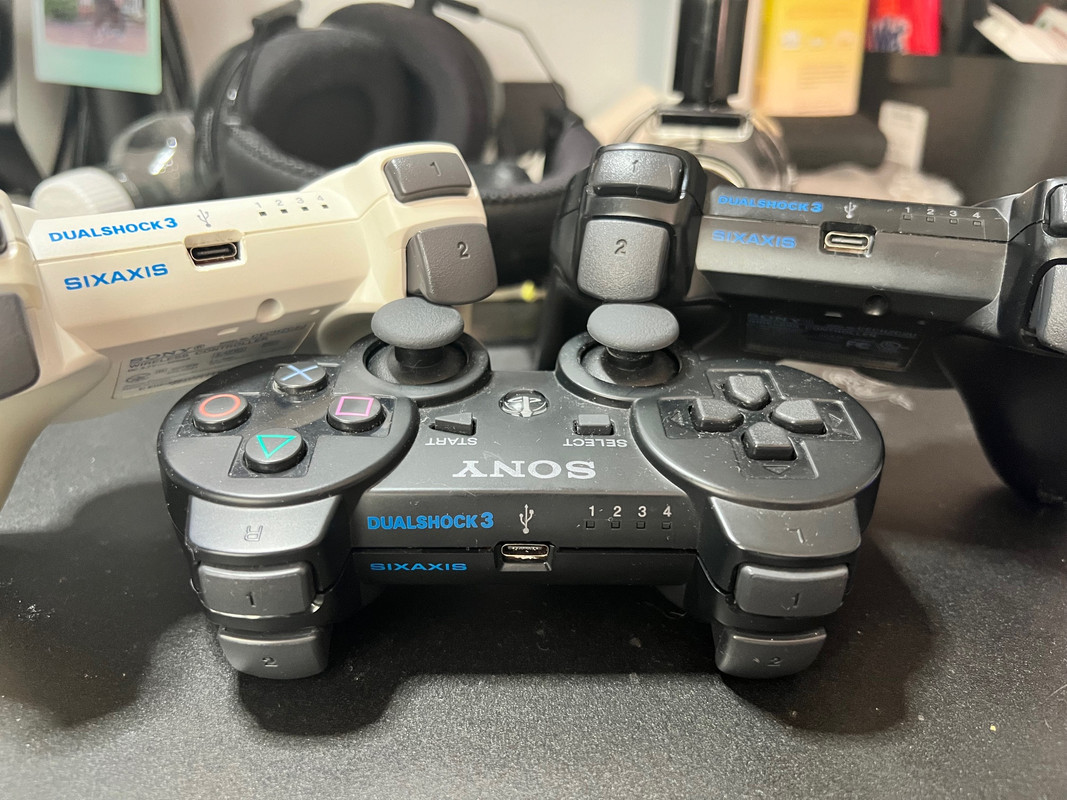
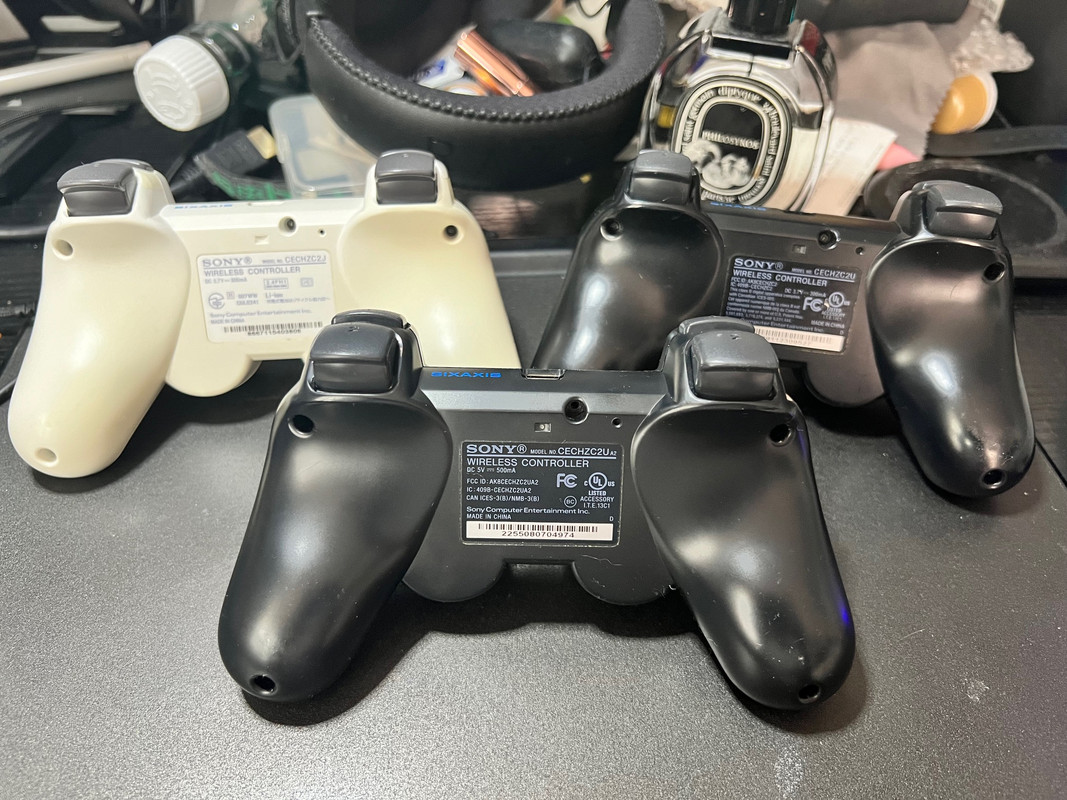
This is my final result:

Works wonderfully!
I'd say this is a 4/10 difficulty mod, you'll need basic to moderate soldering skills. The worst part IMO by far is desoldering the old mini USB port.
Requirements:
- A DualShock 3 whose board have exposed pads on the USB port that you can solder to: this is important because some boards (VX6 onwards?) are multilayered, so even though it is technically possible to mod them, you'll have a much harder time doing so. You can check board types on the PS3DevWiki and you can check if your PS3 board is compatible with this mod by simply opening it

- A female USB-C Breakout Board like this one:

- A good soldering iron and some flux if you want the job to be 1000x easier
- Wires, preferably colored (I used 28AWG)
- Needle-nose pliers to remove unnecessary plastic
- Desoldering braid/wick or, even better, a desoldering gun
- Philips head screwdriver (#00 size)
With that out of the way, let's get to the tutorial:
Disassemble your controller by removing the screws on the back. If you have never disassembled a DualShock 3 before, it can be kinda tricky because of the L2/R2 buttons, but it is not a hard job to do. Watch a YouTube video on the subject, it helps a lot.
Remove the battery from its socket. Desolder the two vibration motors from the board. They are connected by 2 wires, just desolder these two points and they're gone. This is not required, but it will make your life 1000x easier because the motors won't be there hanging while you do the mod. If you're unable to desolder the motors, then you probably don't have the soldering skills to do this mod.
Desolder the old mini-USB port. This is, in my opinion, by far the hardest part. De-soldering didn't work for me. I've tried applying new solder, using a desoldering wick, using a heat gun, using every tool at my disposal, NOTHING worked. So I resorted to destroying it with the nose-needle pliers. This is not the recommended way, mind you, 'cause you don't want to destroy a perfectly working port, but if it is already non-working or broken like mine was, then go for it. After desoldering it, clean the pads and remove all the excessive solder.
Solder four wires to the USB-C breakout board. Use a small amount, you don't need a lot of wiring for this mod, a couple centimeters will do. After that, you'll solder the other end of these wires to these points on the DualShock 3 board:
Use some electric tape to isolate the connections.
The USB-C port is slightly larger than the mini-USB port, so you'll need to remove some excess plastic on the DualShock 3 shell, the back side of it. With nose-needle pliers and being careful, you can make it look original. Handle it with care and it'll definitely not look destroyed. You can simply remove this part with the pliers and it'll come out pretty easily:
Find a way to fix/stick/mount the USB-C port to the board, on the other side of the USB port pins, exactly where the old port was. You don't have the mounting holes anymore, so you'll have to be creative. You can just tape it down in place with electric tape, but in my experience it was not strong enough for a USB port, so I just ended up using superglue. Super glue can be removed easily with acetone if someday you decide to replace the USB port again.
Connect the battery and then test the controller and its new USB port. If it is working, you're done! Just solder the vibration motors back in place and then reassemble the controller. That's it!
This is my final result:
Works wonderfully!