PS3 Fault finding YLOD with the SYSCON - First steps and Error reporting

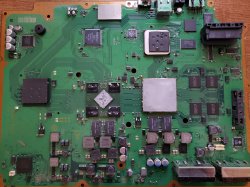
Hey everyone, so I just scanned a CECH-E01 for errors with the SysconReader program for Windows.

These are the results:

Code:
===================================
ERR 00: 00000000 A0403034 27FCFAF8
ERR 01: 00000000 A0404421 27FCFAF8
ERR 02: 00000000 A0403034 27F7EEAE
ERR 03: 00000000 A0404421 27F7EEAE
ERR 04: 00000000 A0403034 27F7EE9C
ERR 05: 00000000 A0404421 27F7EE9C
ERR 06: 00000000 A0403034 27F6AB3A
ERR 07: 00000000 A0404421 27F6AB3A
ERR 08: 00000000 A0403034 27F6640A
ERR 09: 00000000 A0404421 27F6640A
ERR 10: 00000000 A0403034 27F6480B
ERR 11: 00000000 A0404421 27F6480B
ERR 12: 00000000 A0403034 27F64797
ERR 13: 00000000 A0404421 27F64797
ERR 14: 00000000 A0801601 27F64769
ERR 15: 00000000 A08014FF 27F64769
ERR 16: 00000000 A0801701 27F64769
ERR 17: 00000000 A0801200 199A754B
ERR 18: 00000000 A0801200 13905007
ERR 19: 00000000 A0801200 107300C9
===================================

I'm familiar with the 3034 error, and am assuming this is another likely BGA issue, but I have never seen the 4421 error.

Are Data errors random? I've seen another PS3 (CECH-H01) with a 3034 + 4401 which was a BGA issue confirmed, and a another CECH-E01 which has 3034 + 4412, which I have not attempted to repair yet.
 
Your errors are telling a story:
  1. Previous user had a fairly common RSX failure, a YLOD probably requiring a reball to fix. Pehaps they tried the hairdrier trick to temporarily get the console to boot and work long enough to sell it. That explains the string of 3034+4421 errors at different timestamps. .
    • 3034 (RSX defect requiring reball)
    • 4421 (common error associated with 3034)
  2. Someone attempted a reflow, which wasn't effective. Now the errors seem to suggest the CPU was damaged. Perhaps they were too aggressive with the heat gun, causing a CPU BGA defect.
    • 1601 = BE Livelock Detection. "A Livelock is a situation where a request for an exclusive lock is denied repeatedly, as many overlapping shared locks keep on interfering each other. The processes keep on changing their status, which further prevents them from completing the task. This further prevents them from completing the task."
    • 1701 = BE Attention
    • 14FF = Check Stop
  3. Then they went to town on the console with a heat gun destroying the CPU thermal sensor (which is near the RSX).
    • 1200 = BE Thermal Sensor
I wouldn't hold out much hope for that console. I'd check the thermal sensor to see if it was blown off it's pad or moved. If not then you may need to replace it. Then you could try a CPU reball.
 
Well, I did test more as I said I would do and, sure enough... Flipping the rocker IS indeed causing the 1001 errors to be registered in the log. Not just 1004. If instead I hold my finger for the 10sec to force shutdown, no new errors are generated.
I tested this on 2 different C models with GLOD.
But I also tested this on more working consoles and the results were interesting too.
On a working slim, I could not have any errors be registered at all.
But on a working C model, I could not get any errors to trigger reliably. Most of the times no error at all, sometimes 1004 and yes, sometimes 1001.
Now on yet another working C model... What I found is actually more interesting. Sometimes it would register a 1002 error.
Yes 1002, not just 1001 or even 1004.

So OK, for the sake of argument, let's assume that error 1001 could actually indicate tokin problems in some cases (much like 1002) but less common.

This still doesn't invalidate my point that simply seeing this error in the log is not enough to isolate any problem. You need to watch it happen in the form of a YLOD, ideally capturing the error with bringup.
Otherwise it's meaningless!
Please people don't be misled, but especially don't mislead others either

As I've said before, you don't have to take my word for it. This isn't what we are here for... Anyone can test.

If you are wondering how I can test this easily, is because before I assembled the working consoles, I did this:

Cheers
Well, I noticed when my Oscilloscope probes were connected to the TOKINs +/GND and I flipped the switch ON, that the voltage would spike. I wonder if there is a momentary surge while flipping it off as well? That could suggest that the filter is not doing a good enough job of suppressing those spikes if 1001's are getting through. I wonder what would happen if you took one of those GLOD consoles and replaced the tokins on them (using my PCB so as not to add too much heat that could cause a false positive)? I wonder if the 1001's would go away when you PWR off. I didn't sit there and PWR off the wrong way, over and over, just to see what errors it generated. Seems like a good way to corrupt the HDD. So maybe it's normal.
 
Your errors are telling a story:
  1. Previous user had a fairly common RSX failure, a YLOD probably requiring a reball to fix. Pehaps they tried the hairdrier trick to temporarily get the console to boot and work long enough to sell it. That explains the string of 3034+4421 errors at different timestamps. .
    • 3034 (RSX defect requiring reball)
    • 4421 (common error associated with 3034)
  2. Someone attempted a reflow, which wasn't effective. Now the errors seem to suggest the CPU was damaged. Perhaps they were too aggressive with the heat gun, causing a CPU BGA defect.
    • 1601 = BE Livelock Detection. "A Livelock is a situation where a request for an exclusive lock is denied repeatedly, as many overlapping shared locks keep on interfering each other. The processes keep on changing their status, which further prevents them from completing the task. This further prevents them from completing the task."
    • 1701 = BE Attention
    • 14FF = Check Stop
  3. Then they went to town on the console with a heat gun destroying the CPU thermal sensor (which is near the RSX).
    • 1200 = BE Thermal Sensor
I wouldn't hold out much hope for that console. I'd check the thermal sensor to see if it was blown off it's pad or moved. If not then you may need to replace it. Then you could try a CPU reball.

I'm assuming you're thinking error 19 is the most recent error in that list while error 0 is the oldest one recorded. I'm pretty positive it's actually the other way around, because I powered up the console and let it YLOD a few times to see how the list would change and here is what I got the second time I scanned for errors:


Code:
===================================
ERR 00: 00000000 A0403034 FFFFFFFF
ERR 01: 00000000 A0404421 FFFFFFFF
ERR 02: 00000000 A0403034 FFFFFFFF
ERR 03: 00000000 A0404421 FFFFFFFF
ERR 04: 00000000 A0403034 FFFFFFFF
ERR 05: 00000000 A0404421 FFFFFFFF
ERR 06: 00000000 A0403034 FFFFFFFF
ERR 07: 00000000 A0404421 FFFFFFFF
ERR 08: 00000000 A0403034 FFFFFFFF
ERR 09: 00000000 A0404421 FFFFFFFF
ERR 10: 00000000 A0403034 27F7EE9C
ERR 11: 00000000 A0404421 27F7EE9C
ERR 12: 00000000 A0403034 27F6AB3A
ERR 13: 00000000 A0404421 27F6AB3A
ERR 14: 00000000 A0403034 27F6640A
ERR 15: 00000000 A0404421 27F6640A
ERR 16: 00000000 A0403034 27F64C8C
ERR 17: 00000000 A0404421 27F64C8C
ERR 18: 00000000 A0403034 27F64C2B
ERR 19: 00000000 A0404421 27F64C2B
===================================

So based on this, it looks like those other errors came first, and then the constant 3034 + 4421 came after and is what we're stuck with atm. I fully disassembled the system to inspect the area around the processors and everything looked fine to me. Someone previously delidded the GPU but left the CPU alone. I'll share some pictures of the bottom side of the board exactly as I found it, maybe i'm missing something here.
 

Attachments

  • 20210412_213001.jpg
    20210412_213001.jpg
    4 MB · Views: 164
  • 20210412_213155.jpg
    20210412_213155.jpg
    2.4 MB · Views: 146
  • 20210412_213203.jpg
    20210412_213203.jpg
    2.5 MB · Views: 485
  • 20210412_213216.jpg
    20210412_213216.jpg
    2.3 MB · Views: 161
  • 20210412_213222.jpg
    20210412_213222.jpg
    2.3 MB · Views: 810
Also, does anyone else who uses the Syscon Reader program constantly experience it freezing? It authenticates fine, then just hangs on a random single number for several minutes. When it does this a bunch of times in a row, I uninstall my serial device's driver and restart my PC and start again. I've tried this on both the USB ports in front of and behind my PC, it's all the same. What should be a 10 minute process usually becomes an hour. It's annoying. I would do the manual way, but i refuse to install Linux just for that, and i haven't found any clear guides for Windows.
 
I'm assuming you're thinking error 19 is the most recent error in that list while error 0 is the oldest one recorded. I'm pretty positive it's actually the other way around, because I powered up the console and let it YLOD a few times to see how the list would change and here is what I got the second time I scanned for errors:


Code:
===================================
ERR 00: 00000000 A0403034 FFFFFFFF
ERR 01: 00000000 A0404421 FFFFFFFF
ERR 02: 00000000 A0403034 FFFFFFFF
ERR 03: 00000000 A0404421 FFFFFFFF
ERR 04: 00000000 A0403034 FFFFFFFF
ERR 05: 00000000 A0404421 FFFFFFFF
ERR 06: 00000000 A0403034 FFFFFFFF
ERR 07: 00000000 A0404421 FFFFFFFF
ERR 08: 00000000 A0403034 FFFFFFFF
ERR 09: 00000000 A0404421 FFFFFFFF
ERR 10: 00000000 A0403034 27F7EE9C
ERR 11: 00000000 A0404421 27F7EE9C
ERR 12: 00000000 A0403034 27F6AB3A
ERR 13: 00000000 A0404421 27F6AB3A
ERR 14: 00000000 A0403034 27F6640A
ERR 15: 00000000 A0404421 27F6640A
ERR 16: 00000000 A0403034 27F64C8C
ERR 17: 00000000 A0404421 27F64C8C
ERR 18: 00000000 A0403034 27F64C2B
ERR 19: 00000000 A0404421 27F64C2B
===================================

So based on this, it looks like those other errors came first, and then the constant 3034 + 4421 came after and is what we're stuck with atm. I fully disassembled the system to inspect the area around the processors and everything looked fine to me. Someone previously delidded the GPU but left the CPU alone. I'll share some pictures of the bottom side of the board exactly as I found it, maybe i'm missing something here.
Yeah this comes back to what I was talking about. When troubleshooting, you should only address the current error first (3034/4421). You can't really address the old errors while there's another error right now.
But as Felix says, the log can still tell a story.
It can be seen that this console had severe overheating problems (error 1200; Cell overheating)
Maybe the owner then tried to fix this problem by opening the console and delidding, but was probably scared of the CPU and just delidded the RSX, thinking it would be easier or safer. (A mistake)
It's possible that he broke a precarious RSX connection while prying... Resulting in the current 3034

And this is what you have; a 3034. I wouldn't really be scared of a broken CPU because the old CPU errors were in the ON (prefix 80) state. Probably just related to the overheating too.


Also, does anyone else who uses the Syscon Reader program constantly experience it freezing? It authenticates fine, then just hangs on a random single number for several minutes. When it does this a bunch of times in a row, I uninstall my serial device's driver and restart my PC and start again. I've tried this on both the USB ports in front of and behind my PC, it's all the same. What should be a 10 minute process usually becomes an hour. It's annoying. I would do the manual way, but i refuse to install Linux just for that, and i haven't found any clear guides for Windows.
Yeah, the syscon reader program is just to make it more accesible for those newcomers that can't be bothered to do it the proper way. And It delivers just that.

And yeah good thing you asked. I think somebody did make a step by step guide for Windows users. Look for it, it's there and it should help you. There's perhaps something even better coming soon, so stay tuned hehehe. But that's it for now.

Cheers
 
Well, I noticed when my Oscilloscope probes were connected to the TOKINs +/GND and I flipped the switch ON, that the voltage would spike. I wonder if there is a momentary surge while flipping it off as well? That could suggest that the filter is not doing a good enough job of suppressing those spikes if 1001's are getting through. I wonder what would happen if you took one of those GLOD consoles and replaced the tokins on them (using my PCB so as not to add too much heat that could cause a false positive)? I wonder if the 1001's would go away when you PWR off. I didn't sit there and PWR off the wrong way, over and over, just to see what errors it generated. Seems like a good way to corrupt the HDD. So maybe it's normal.
Yeah maybe it's normal and it means nothing. That's my whole point hehehe.

It could even be down to the PSU (or the rest of the power delivery system for that matter). When the power is cut, a residual amount of power is stored in the PSU capacitors and is enough for the console to stay on for a split second longer before noticing something's wrong with the power. It could become apparent first on CPU power (1001; the biggest hog after all) RSX power (1002) or be too fast and register nothing at all. Or just a more accurate 1004 (AC DC power error).
Hell, it could even depend on what task the system was doing or the exact moment when the power was cut.
But why even bother with this after all?

The experiment you mention has already been done multiple times (which is part of the reason why I feel this stubbornness is necessary).
I think for example @squeept recently had a GLOD and decided to go ahead and change all capacitors just in case because he was seeing the darn 1001 errors in the log. I don't think there was any change but maybe ask him, Probably it's not the first time he goes through this either.

Cheers
 
I'm going to buy the stuff to try out the syscon within the next 2 weeks. Hopefully it's not all for nothing. Once I do get around to it, if 3034 comes up at all, it's completely pointless to proceed, right? Replacing a PSU I can do, capacitors, de-lidding, etc. I'm assuming a 3034 "fix" requires expensive as hell machines.

In terms of de-lidding, what tool works best, a painters knife? I've seen someone use a razor blade but idk.

If you see a 3034 error, be prepared to murder multiple PS3's before you actually fix one. My next reball attempt will be my third, and im using a cheap preheater and hot air station with a vacuum pickup tool to lift the GPU. Both of which cost me about $300 to setup for this. The soldering iron, fume extractor, reballing kit, temperature sensor, flux, solder, wick will at minimum cost another $280 assuming you go for the cheap stuff.
 
Last edited:
@Sampsonay IDK about the executable program, I'm used to using windows CMD prompt and internal commands. They show the older errors at the top of the list and generate new ones toward the bottom. However, it could just be the opposite story. Started out with overheating errors that progressed to a BGA failure. That actually makes mores sense given that your board was opened and the RSX was delidded, but not the CPU.

People are put off buy the CPU, but the deliding tool is not hard to make and once you have it, it's the easiest thing to remove. Speaking of which... @Billerd I answered your questions a few pages back (thoroughly). Why are you spamming the thread?
So the USB adapter I linked has a connector on the end designed to be connected to the pins on a raspberry pi. It's the same square connector used for PC's HDD LED +/- , PWR btn +/GND, and front I/O. Since you've worked on PC's you'll know what I mean. So you just need to be able to connect to that. Breadboard wires are ideal, but you could hack something together using your own wires and a JST connector or something. You'll figure it out with a little ingenuity.

And for the delid tool...
Make one of these to delid the CPU:

Heat up the end of a fingernail file (buy one from the store, don't grab one from the GF or Misses unless you have a death wish). Use a lighter to heat the tip up and make the metal malleable, then bend ~1cm of the tip to an angle with pliers. Now use a dremel with a sanding stone to grind away the bottom of the tip and make it very thin. It needs to be able to fit underneath the heat spreader on the CPU. Notice there is a gap in the silicone glue on one side:

Use sand paper to blunt the bottom edge of the tool so it can't dig into the substrate, where the traces are on the CPU. That'll destroy them. Just rub the tool along some paper and if it glides smooth you'll be fine. Now use some vasoline or grease to get the tool started. Place it under the edge of the heat spreader and use firm steady pressure. Brace with both hand so you don't slip. Once the tool begin cutting it will ride along a cushion of silicone and the blunt edge will force the sharp cutting edge against the Heat spreader. Now just cut along the edge of the chip, all the way around it. Be careful at the end, when you're about to cut through or you can slip and cut something you don't want to. Just watch this video and you'll have a good idea how to do it.
For the GPU, you need to use a different method:
NSC is pretty long winded, but he shows how to safely delid the RSX earlier in the video. His method is good for doing it cold, but I don't really like his method. It's longer and hard to get a good angle. And his hammer scares the sh!t out of me! I prefer to use hot air (hair drier works too) to warm the RSX for a minute or so (not directly on the chip, but in circular motions 4-5 inches above it just, to get the glue warm, not hot). This softens the thermal adhesive enough so you can pop off the RSX heat Spreader. I use a card and a thin butter knife. The side that faces the CPU, with traces going between them, doesn't have any SMD components like the other 3 sides do. So you can only do this on that side. Heat, insert the card, then use the butter knife to get under the edge of the heat spreader. Be sure you get under the heat spreader, not just on the edge of it. You actually need to get underneath it so you can gently add prying force. Slowly add pressure until the glue gives and the heat spreader pops off. The card protects the substrate from the blunt metal edge of the butter knife. Use something thinner if you can't get under the edge with your butter knife, but be sure it's blunt or it can ding into the substrate (even digging through the card first). It need to be thin enough to get under, but have enough girth to not bend when you pry up.

Sounds complicated but the process is actually quite easy, only takes a few minutes. The hardest par is making the proper CPU deliding tool. It took me about an hour shaving down the tip to get it thin enough to fit under the IHS. I'd shave it a bit, test. Shave away a bit more, then test. Sand, test. eventually I got it to work. I have delided about six consoles now and the CPU is the easiest because of that tool. Most people can delid their RSX pretty easily, but are deterred by the silicone on the CPU. The CPU really needs it or the console will suffer from overheating.
 
Here are the windows command I use:
Code:
CD C:\Users\HTPC\Desktop\PS3\SYSCON
python ps3_syscon_uart_script.py COM4 CXRF
The first line just changes the directory to the folder containing the python script. The second line runs it in internal access mode. You'll have to check the device manager to fin what COM port your serial adapter was assigned by windows (it changes). And for external access you'll need to change to "CXR" or possibly "SF" for your model...IDK.

Then "AUTH" or "auth"
Then "GET ERRLOG"

Make sense?

If you can't get past the first part then you need to open the CMD prompt and install the dependencies:
Code:
pip install pyserial
Code:
pip install pycryptodome
...then exit and try again.

Edited to correct the command to "pycryptodome."
Please excuse all the questions, i've been trying to figure this out for hours on my own and just don't get this.
May I ask what version of Python(s) you're using? My interoperation of what the guide said is that Python 3 works with both CXR and SW.

I opened CMD as admin and CD'd to the ps3syscon-master folder then ran "python ps3_syscon_uart_script23.py COM5 CXR"

(COM5 is my serial adapter's number in device manager and I want to run this in external mode because I only care about getting error codes, nothing else.)

Python not found. Okay, then i tried "pip install pyserial" and that isn't a valid command in CMD. So I opened up a Python terminal and tried it there, still nothing. My exact Python version is 3.9.4 64-bit.

I uninstalled Python and reinstalled it again, this time making sure pip is checked in the optional section, and it was by default. Still stuck where I was before.

Sounds like you're missing the option to add python to your %path% system variable. If your python installer has that option (of adding to the system variable), then make sure to check it. If not, Google instructions on how to add it to the path. Once that's done, the "python not found" error should go away.
 
Please excuse all the questions, i've been trying to figure this out for hours on my own and just don't get this.
May I ask what version of Python(s) you're using? My interoperation of what the guide said is that Python 3 works with both CXR and SW.

I opened CMD as admin and CD'd to the ps3syscon-master folder then ran "python ps3_syscon_uart_script23.py COM5 CXR"

(COM5 is my serial adapter's number in device manager and I want to run this in external mode because I only care about getting error codes, nothing else.)

Python not found. Okay, then i tried "pip install pyserial" and that isn't a valid command in CMD. So I opened up a Python terminal and tried it there, still nothing. My exact Python version is 3.9.4 64-bit.

I uninstalled Python and reinstalled it again, this time making sure pip is checked in the optional section, and it was by default. Still stuck where I was before.

Also, forgot to mention -- early versions of the script were only compatible with python 2.7, but the current version of the script, available in the repo, does support python 3. You still need to install the dependencies after that, of course -- pyserial and pycrypto.
 
Yes, you must check the box in the installer that says "add pthon to PATH", which isn't by default. @Pacorretaco tutorial is good, but he should have spelled that out instead of telling you to check the filth option. They tend to change the location of that option in the installer from version to version. The newer versions of python should be supported now, but I have been using 2.7.

I just edited my post you quoted to make this clearer. @Pacorretaco I suggest you edit your tutorial as well.
 
Last edited:
Please excuse all the questions, i've been trying to figure this out for hours on my own and just don't get this.
May I ask what version of Python(s) you're using? My interoperation of what the guide said is that Python 3 works with both CXR and SW.

I opened CMD as admin and CD'd to the ps3syscon-master folder then ran "python ps3_syscon_uart_script23.py COM5 CXR"

(COM5 is my serial adapter's number in device manager and I want to run this in external mode because I only care about getting error codes, nothing else.)

Python not found. Okay, then i tried "pip install pyserial" and that isn't a valid command in CMD. So I opened up a Python terminal and tried it there, still nothing. My exact Python version is 3.9.4 64-bit.

I uninstalled Python and reinstalled it again, this time making sure pip is checked in the optional section, and it was by default. Still stuck where I was before.

Yes, you must check the box in the installer that says "add pthon to PATH", which isn't by default. @Pacorretaco tutorial is good, but he should have spelled that out instead of telling you to check the filth option. They tend to change the location of that option in the installer from version to version. The newer versions of python should be supported now, but I have been using 2.7.

I just edited my post you quoted to make this clearer. @Pacorretaco I suggest you edit your tutorial as well.
Ok, maybe a bit late for sampsonay but here's the small guide again.
Now slightly tweaked to be more specific about the path environment variable.
I wanted to keep it simpler for some people who will understandably scratch their heads when hearing such terms and I didn't anticipate people trying to use python 3 as well as my guide. But should be better now thanks to the feedback.

I write this in addition to main guide (work in progress) done by db260179.
https://www.psx-place.com/threads/f...syscon-first-steps-and-error-reporting.30100/


I will try to explain step by step, as easy as I can explain it.
Really this can be done in 10 minutes.

First of all let's make clear what we are doing:
We are simply running a python script that will let us communicate with the PS3 SYSCON, using a 3.3v serial (COM) port.

We can thank guys like 'Major' and 'zecoxao' for making this possible in the first place. We are just running their script.

So, what do we need in order to run this script?

Python installed, with additional modules pycryptodome and pyserial

*For Windows users (most people) this is what you can do:

-First install python 2.7.18 (you can get from python.org) (newer versions may or may not be supported but 2.7.18 is guaranteed to work)
-When you run the installer, you can check the last box "add to Path environment variable" (it will make things easier; allows you to run python commands from any location)
Once it's installed, you should already be able to run python commands and scripts. How? Directly from the windows command prompt (which you can open in many ways; I like shift+right click to open cmd window here)
you can type: python script.py

But our particular script relies on two additional modules. (If you try without them, it will tell you the problem)
But don't worry,
-You can download and install them automatically by typing:
pip install pycryptodome
pip install pyserial

That's it. Now you should be able to run the magic script. Just specify the COM port and the syscon mode at the end.
-For example:

python uart_script.py COM4 CXR

What COM port?
This is where the USB to serial 3.3v adapter comes in handy.
When you plug it into your computer, it should show up in device manager as a COM port. If not, you need to install drivers for it.
This will depend on your particular computer and dongle.

What is CXR? This will depend on the syscon you are trying to communicate with. SW is for newer (SherWood) Syscons. CXR(F) for the older BGA models
Further details in the main PDF guide

If all is correct, no errors will come up immediately. Even without anything physically connected.
You can then type AUTH, and will get
"Auth1 response invalid"

Of course, to get past this, everything has to be connected and working properly. Even then it may take a couple tries in a row. Eventually you should get:
Auth successful

Which means all is good and you can now run external commands such as
ERRLOG GET 00

(If you are still getting "Auth1 response invalid", first simply try again a couple times, turn the ps3 power off and on, if not, swap Rx and Tx wires around and repeat. Check the connections etc... It should work in the end)


That's it for now

*But what serial adapter dongle should I get?

-This is the one I got and it works. 2$ worldwide.

US $1.14 | High Quality FT232RL FT232 FTDI USB 3.3V 5.5V to TTL Serial Adapter Module Mini Port
https://a.aliexpress.com/_vLbCPR

FT232RL is the name of the main IC.
But many others will work too. Get what's most available to you. These are widely used for many other applications. They are COMmon.
-Just make sure it's working at 3.3v. (Very important) (To make sure you can check 3.3v with a multimeter between Rx/Tx and GND) If it's 5v or more... It can damage the SYSCON so be careful... 3.3v only!

And yeah there's something coming that will make it even easier for everyone to follow. So just stay tuned.
You wouldn't happen to be the "Paco" a certain youtuber was referring to in one of his recent videos would you?
There's lots of Pacos.
But yeah I might just be that one hehe.
 
Last edited:
Hiya,

A long-time lurker, finally a poster.

I have in me hands a CECHC03 that appears to have had the RSX reballed at one point (judging by the pool of flux on the board and an off-brand security label on the torx screw plug), then worked for some time as a BD player (came with a kiddy disk inside), got a YLOD and someone didn't feel like fixing it again and passed it on... Now, it had arrived here in this YLOD state, but I didn't know much about diagnostics via syscon, so went with the NEC/Token waft.

I had recapped this COK-002 on the side of the board without chips and the system came to life, silently glowing with a green light. Surprised, I had connected the HDMI lead and gotten to a point of seeing the XMB, twice, but both times the PS3 was shutting down due to the overheating. Fine, time to de-lid and re-paste everything, so I did .. and upon assembling everything back it had a YLOD again, a very quick one (0.5 sec) at that. So out went the NEC/Tokens on the chip side and replaced with TaPol counterparts. Now, the system boots into a GLOD (everything bar the SD board is connected), recovery doesn't work and I need to hold the power down for 10 sec to shut it off .. What's peculiar, is in the UART readouts I get from the syscon .. there's nothing, yet the system is dead.

Initial state of things after recapping, which lead to it booting into a GLOD:
Code:
>$ becount
becount
Bringup : 2466 times
Shutdown: 2342 times
Power-on: 107day 03hour 32min 44sec

>$ lasterrlog
lasterrlog
Last Error Code:0xa0801001, Time:0xffffffff
[mullion]$

>$ errlog
errlog
ofst[ 96]:err_code:0xffffffff, clock:0xffffffff
ofst[100]:err_code:0xa0404411, clock:0xffffffff
ofst[104]:err_code:0xa0403034, clock:0xffffffff
ofst[108]:err_code:0xa0404411, clock:0xffffffff
ofst[112]:err_code:0xa0403034, clock:0xffffffff
ofst[116]:err_code:0xa0404411, clock:0xffffffff
ofst[120]:err_code:0xa0403034, clock:0xffffffff
ofst[124]:err_code:0xa0404411, clock:0xffffffff
ofst[  0]:err_code:0xa0403034, clock:0xffffffff
ofst[  4]:err_code:0xa0404411, clock:0xffffffff
ofst[  8]:err_code:0xa0403034, clock:0xffffffff
ofst[ 12]:err_code:0xa0404411, clock:0xffffffff
ofst[ 16]:err_code:0xa0403034, clock:0xffffffff
ofst[ 20]:err_code:0xa0404411, clock:0xffffffff
ofst[ 24]:err_code:0xa0403034, clock:0xffffffff
ofst[ 28]:err_code:0xa0404411, clock:0xffffffff
ofst[ 32]:err_code:0xa0403034, clock:0xffffffff
ofst[ 36]:err_code:0xa0404411, clock:0xffffffff
ofst[ 40]:err_code:0xa0403034, clock:0xffffffff
ofst[ 44]:err_code:0xa0404411, clock:0xffffffff
ofst[ 48]:err_code:0xa0403034, clock:0xffffffff
ofst[ 52]:err_code:0xa0801001, clock:0xffffffff
ofst[ 56]:err_code:0xa0801001, clock:0xffffffff
ofst[ 60]:err_code:0xa0801001, clock:0xffffffff
ofst[ 64]:err_code:0xa0801001, clock:0xffffffff
ofst[ 68]:err_code:0xa0801001, clock:0xffffffff
ofst[ 72]:err_code:0xa0801001, clock:0xffffffff
ofst[ 76]:err_code:0xa0801001, clock:0xffffffff
ofst[ 80]:err_code:0xa0902203, clock:0xffffffff
ofst[ 84]:err_code:0xa0902203, clock:0xffffffff
ofst[ 88]:err_code:0xa0902203, clock:0xffffffff
ofst[ 92]:err_code:0xa0801001, clock:0xffffffff

Cleared the log and rebooted - no errors, yet the glaring GLOD is there. Would it not report at least some problem that prevents the darn thing from starting?

Code:
>$ clearerrlog
clearerrlog
ERRLOG CLEARED
[mullion]$

>$ bringup
bringup
[SSM] state: 0000 -> 0101
Bringup Mode #0 (0xFF)
[SSM] ssmCb_OnStartingBePowOn() called.
[SSM] First Boot.
[SSM] Bringup mode : syspm_stat=00000000/00000000
[POWSEQ] PowerSeq_Setup called.
[SSM] state: 0101 -> 0201
[POWSEQ] AV Backend Setup
[SSM] state: 0201 -> 0102
[SSM] state: 0102 -> 0202
[SSM] state: 0202 -> 0103
[SSM] state: 0103 -> 0203
[SSM] ssmCb_BeforeBeOn() called.
[SSM] state: 0203 -> 0104
Psbd_SbTransMode_Half:0x21e2

>$ errlog
errlog
ofst[  0]:err_code:0xffffffff, clock:0xffffffff
ofst[  4]:err_code:0xffffffff, clock:0xffffffff
ofst[  8]:err_code:0xffffffff, clock:0xffffffff
ofst[ 12]:err_code:0xffffffff, clock:0xffffffff
ofst[ 16]:err_code:0xffffffff, clock:0xffffffff
ofst[ 20]:err_code:0xffffffff, clock:0xffffffff
ofst[ 24]:err_code:0xffffffff, clock:0xffffffff
ofst[ 28]:err_code:0xffffffff, clock:0xffffffff
ofst[ 32]:err_code:0xffffffff, clock:0xffffffff
ofst[ 36]:err_code:0xffffffff, clock:0xffffffff
ofst[ 40]:err_code:0xffffffff, clock:0xffffffff
ofst[ 44]:err_code:0xffffffff, clock:0xffffffff
ofst[ 48]:err_code:0xffffffff, clock:0xffffffff
ofst[ 52]:err_code:0xffffffff, clock:0xffffffff
ofst[ 56]:err_code:0xffffffff, clock:0xffffffff
ofst[ 60]:err_code:0xffffffff, clock:0xffffffff
ofst[ 64]:err_code:0xffffffff, clock:0xffffffff
ofst[ 68]:err_code:0xffffffff, clock:0xffffffff
ofst[ 72]:err_code:0xffffffff, clock:0xffffffff
ofst[ 76]:err_code:0xffffffff, clock:0xffffffff
ofst[ 80]:err_code:0xffffffff, clock:0xffffffff
ofst[ 84]:err_code:0xffffffff, clock:0xffffffff
ofst[ 88]:err_code:0xffffffff, clock:0xffffffff
ofst[ 92]:err_code:0xffffffff, clock:0xffffffff
ofst[ 96]:err_code:0xffffffff, clock:0xffffffff
ofst[100]:err_code:0xffffffff, clock:0xffffffff
ofst[104]:err_code:0xffffffff, clock:0xffffffff
ofst[108]:err_code:0xffffffff, clock:0xffffffff
ofst[112]:err_code:0xffffffff, clock:0xffffffff
ofst[116]:err_code:0xffffffff, clock:0xffffffff
ofst[120]:err_code:0xffffffff, clock:0xffffffff
ofst[124]:err_code:0xffffffff, clock:0xffffffff

>$ shutdown
shutdown
[SSM] state: 0400 -> 0500
[POWSEQ] AV Backend Letup
[SSM] ssmCb_AfterBeOn() called.
[SSM] Shutdown mode ... req_wake_src = 000002F4, ctxt=00/00
[SSM] Shutdown mode : syspm_stat=00000000/00000000
[POWSEQ] PowerSeq_Letup called.
[SSM] state: 0500 -> 0000
(PowerOff State)

If I request powerstate before shutdown, it comes back with the following:
Code:
>$ powerstate
[SSM] state: 0104 -> 0204
[SSM] state: 0204 -> 0105
[SSM] state: 0105 -> 0400
(PowerOn State)
[SERV NVS] READ CMD
Boot Loader SE Version 1.5.0 (Build ID: 1798,18531, Build Data: 2007-01-10_12:09:26)
Copyright(C) 2006 Sony Computer Entertainment Inc.All Rights Reserved.
[SERV SETCFG] XDR (CH0,CH1) ASSERT
[SERV SETCFG] XDR (CH0,CH1) DEASSERT
[ERROR]: 0xb0002001 (FATAL) XDR Link not initilized.
ITC_DUMP000000000000000000000000000000000000000000000000000000000000000000000000000000000000000000000000000000000000000000000000000000000000000000000000000000000000000000000000000000000000000000000000000000000000000000000000000000000000000000000000000000000000000000000000000000000000000000000000000000000000000000000000000000000000000000000000000000000000000000000000000000000000000000000000000000000000000000000000000000000000000000000000000000000000000000000000000000000000000000000000000000000000000000000000000000000000000000000000000000000000000000000000000000000000000000000000000000000000000000000000000000000000000000000000000000000000000000000000000000000000000000000000000000000000000000000000000000000000000000000000000000000000000000000000000000000000000000000000000000000000000000000000000000000000000000000000000000000000000000000000000000000000000000000000000000000000000000000000000000000000000000000000000000000000000000000000000000000000000000000000000000000000000000000000000000000000000000000000000000000000000000000000000000000000000000000000000000000000000000000000000000000000000000000000000000000000000000000000000000000000000000000000
PTC_DUMP0000000000000000000000000000000000000000000000000000000000000000000000000000000000000000000000000000000000000000000000000000000000000000000000000000000000000000000000000000000000000000000000000000000000000000000000000000000000000000000000000000000000000000000000000000000000000000000000000000000000000000000000000000000000000000000000000000000000000000000000000000000000000000000000000000000000000000000000000000000000000000000000000000000000000000000000000000000000000000000000000000000000000000000000000000000000000000000000000000000000000000000000000000000000000000000000000000000009e90a45000000000a5d0ac3000000000a330a930000000009bb0a21000000000a4b0aa9000000000a4a0aa80000000009db0a31000000000a550ab50000000000000000000000000a330a91000000000a2b0a8a0000000009e60a3d000000000a460aa50000000009c80a1a0000000009da0a3a0000000009c60a240000000009ad0a0c0000000000000000000000000a0a0a640000000009e70a3c000000000a850ae2000000000a760ad40000000009cc0a270000000009cf0a2b0000000009d40a2e000000000a830add0000000000000000000000000a8e0aea000000000a6d0ac9000000000a070a59000000000a8e0ae6000000000a170a710000000009fb0a60000000000a860ae6000000000aa50af70000000000000000
MIC_DUMP0000000000000000000000000000000000000000000000003200000000000000000000000000000000000000000000000000000fffffff8000000000000120000000000000100000800000000000000000000000000000000800000000000000080000000000000000000000000000000000000000000000ffc0000000000000502000000000000000e00000000000006284055ad6b000005d7000000000000071800210000000000a963d6000000000edd61229594ba6b400000000000000001b87000000000000140002000000000004810000000000000100000000000000c8000000000000000000000000000000000010000000000000000000000000001b87000000000000140002000000000004810000000000000100000000000000c800000000000000000000000000000000001000000000000000000000000000502000000000000000e00000000000006284055ad6b000005d7000000000000071800210000000000a963d6000000000edd61229594ba6b40000000000000000800000000000000000000000000000000800000000000000080000000000000000000000000000000000000000000000ffc0000000000000061101700000000040000000000000007cfe000000000000e1c0000000000000000000000000000000000000000000000000fd400000000000000280000000000000000000000000000000000000000000000000000000000000000000000000000000000000000000000000000000130000000000000000
XIO_DUMP0001000a00090000020c00000373000000000018000000000000020c000710e109410000000f000f00200000a08000080001e10f000008540c540000000000010bad000000000000000000000000000c000c000c000c00580058005800580000000000000000007f007f007f007f4438443844384438931593159319931300ff00ff00ff00ff000000000000000000000bad00000bad00220bad00220bad00000000000000000bad3f000bad3f39000000000000000000000000000000000000000000000000000000000000000000000000000000000000000000000000000000000000000000000000000000000000000000000000000000000000000000000000000000000000000000000000000000000000000000000000000000000000000000000000000000000000000000000000000000000000000000000000060806080608060806080608060806080608000200020002000200020002000200020002000000000000000000000000000000000000000000000000000000000000000000000000000000000000000000000000000000000000000000000000000000000000000000000000000000000000000000000000000000000000000000000000000000000000000000000000000000000000000000000000000000000000000000000000000000000000000000000000000000000000000000000000000000000000000000000000000000000000000000000000000000000000000000000000000000000000000000000000000000000000000000000000000000000000000000000000000000000000000000000000000000000000000000000000060806080608060806080608060806080608000200020002000200020002000200020002000000000000000000000000000000000000000000000000000000000000000000000000000000000000000000000000000000000000000000000000000000000000000000000000000000000000000000000000000000000000000000000000000000000000000000000000000000000000000000000000000000000000000000000000000000000000000000000000000000000000000000000000000000000000000000000000000000000000000000000000000000000000000000000000000000000000000000000000000000000000000000000000000000000000000000000000000000000000000000000000000000000000000000000000060806080608060806080608060806080608000200020002000200020002000200020002000000000000000000000000000000000000000000000000000000000000000000000000000000000000000000000000000000000000000000000000000000000000000000000000000000000000000000000000000000000000000000000000000000000000000000000000000000000000000000000000000000000000000000000000000000000000000000000000000000000000000000000000000000000000000000000000000000000000000000000000000000000000000000000000000000000000000000000000000000000000000000000000000000000000powerstate
ATA Power          : ON
PCI Power          : OFF
RSX Power          : ON
XDR Power          : ON
Eurus Power        : ON
SB Power           : ON
RSX Thermal Sensor : AVAILABLE
BE Thermal Sensor  : AVAILABLE

Anyone have any clue as to how to peek and poke the thing in such a state? Cheers
 
Last edited:
Ok, maybe a bit late for sampsonay but here's the small guide again.
Now slightly tweaked to be more specific about the path environment variable.
I wanted to keep it simpler for some people who will understandably scratch their heads when hearing such terms and I didn't anticipate people trying to use python 3 as well as my guide. But should be better now thanks to the feedback.

I write this in addition to main guide (work in progress) done by db260179.
https://www.psx-place.com/threads/f...syscon-first-steps-and-error-reporting.30100/


I will try to explain step by step, as easy as I can explain it.
Really this can be done in 10 minutes.

First of all let's make clear what we are doing:
We are simply running a python script that will let us communicate with the PS3 SYSCON, using a 3.3v serial (COM) port.

We can thank guys like 'Major' and 'zecoxao' for making this possible in the first place. We are just running their script.

So, what do we need in order to run this script?

Python installed, with additional modules pycryptodome and pyserial

*For Windows users (most people) this is what you can do:

-First install python 2.7.18 (you can get from python.org) (newer versions may or may not be supported but 2.7.18 is guaranteed to work)
-When you run the installer, you can check the last box "add to Path environment variable" (it will make things easier; allows you to run python commands from any location)
Once it's installed, you should already be able to run python commands and scripts. How? Directly from the windows command prompt (which you can open in many ways; I like shift+right click to open cmd window here)
you can type: python script.py

But our particular script relies on two additional modules. (If you try without them, it will tell you the problem)
But don't worry,
-You can download and install them automatically by typing:
pip install pycryptodome
pip install pyserial

That's it. Now you should be able to run the magic script. Just specify the COM port and the syscon mode at the end.
-For example:

python uart_script.py COM4 CXR

What COM port?
This is where the USB to serial 3.3v adapter comes in handy.
When you plug it into your computer, it should show up in device manager as a COM port. If not, you need to install drivers for it.
This will depend on your particular computer and dongle.

What is CXR? This will depend on the syscon you are trying to communicate with. SW is for newer (SherWood) Syscons. CXR(F) for the older BGA models
Further details in the main PDF guide

If all is correct, no errors will come up immediately. Even without anything physically connected.
You can then type AUTH, and will get
"Auth1 response invalid"

Of course, to get past this, everything has to be connected and working properly. Even then it may take a couple tries in a row. Eventually you should get:
Auth successful

Which means all is good and you can now run external commands such as
ERRLOG GET 00

(If you are still getting "Auth1 response invalid", first simply try again a couple times, turn the ps3 power off and on, if not, swap Rx and Tx wires around and repeat. Check the connections etc... It should work in the end)


That's it for now

*But what serial adapter dongle should I get?

-This is the one I got and it works. 2$ worldwide.

US $1.14 | High Quality FT232RL FT232 FTDI USB 3.3V 5.5V to TTL Serial Adapter Module Mini Port
https://a.aliexpress.com/_vLbCPR

FT232RL is the name of the main IC.
But many others will work too. Get what's most available to you. These are widely used for many other applications. They are COMmon.
-Just make sure it's working at 3.3v. (Very important) (To make sure you can check 3.3v with a multimeter between Rx/Tx and GND) If it's 5v or more... It can damage the SYSCON so be careful... 3.3v only!

And yeah there's something coming that will make it even easier for everyone to follow. So just stay tuned.

There's lots of Pacos.
Even uncle Paco's sister is the same name.
but yeah I might just be that one hehe.


Thanks for putting this together! If I may be a bit more pushy, I think we can simplify things all around (particularly for newbs) by just removing references to old versions of python and just saying "latest python". M4j0r himself declared the latest version of the script as compatible with python 3+, and @db260179 already updated the repo to include that particular script.

Another idea I had, but haven't had the time to put it together, is to switch to the anaconda distro. Why? Well, anaconda is still python, but it does allow us to create our own "distro", which includes all the dependencies (pyserial and pycryptodome). We can make it stick to a particular version of the libraries, or just have it pull latest. It's fairly simple to do, and then newbs would just have to download anaconda + our package + run the script -- no more fiddling with pip. I've been very, very busy IRL (plus my ps3 is in storage now), though. Anyone wants to try and take this up?
 
Actually what I was really wondering is going into the process of modifying the SYSCON fan tables.
Any of you actually done it?
I haven't seen it mentioned much, even if it's something useful.
And how would that work with SW syscons? The checksums behave differently do they...

It's another thing that needs to be made more comprehensive. After all it doesn't take a real technician to benefit from this. Anybody should be able to benefit from this.

Cheers
 

Similar threads

Back
Top