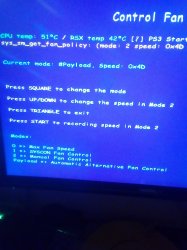
PS3 Overheat problems & CELL delidding

So CELL is okay. So you have to look onto other issues.

Two issues that first come to my mind is bad front panel (maybe due bad connecting band) or a short circuit somewhere.
Not sure yet, but it looks like :)

The 3 beeps sometimes happens because you have a disc inside the BD drive, not sure if could be that what is causing the 3 beeps
By the way, take a closer look at connecting band on front panel. Do you see its imprints have any decay or dirt?
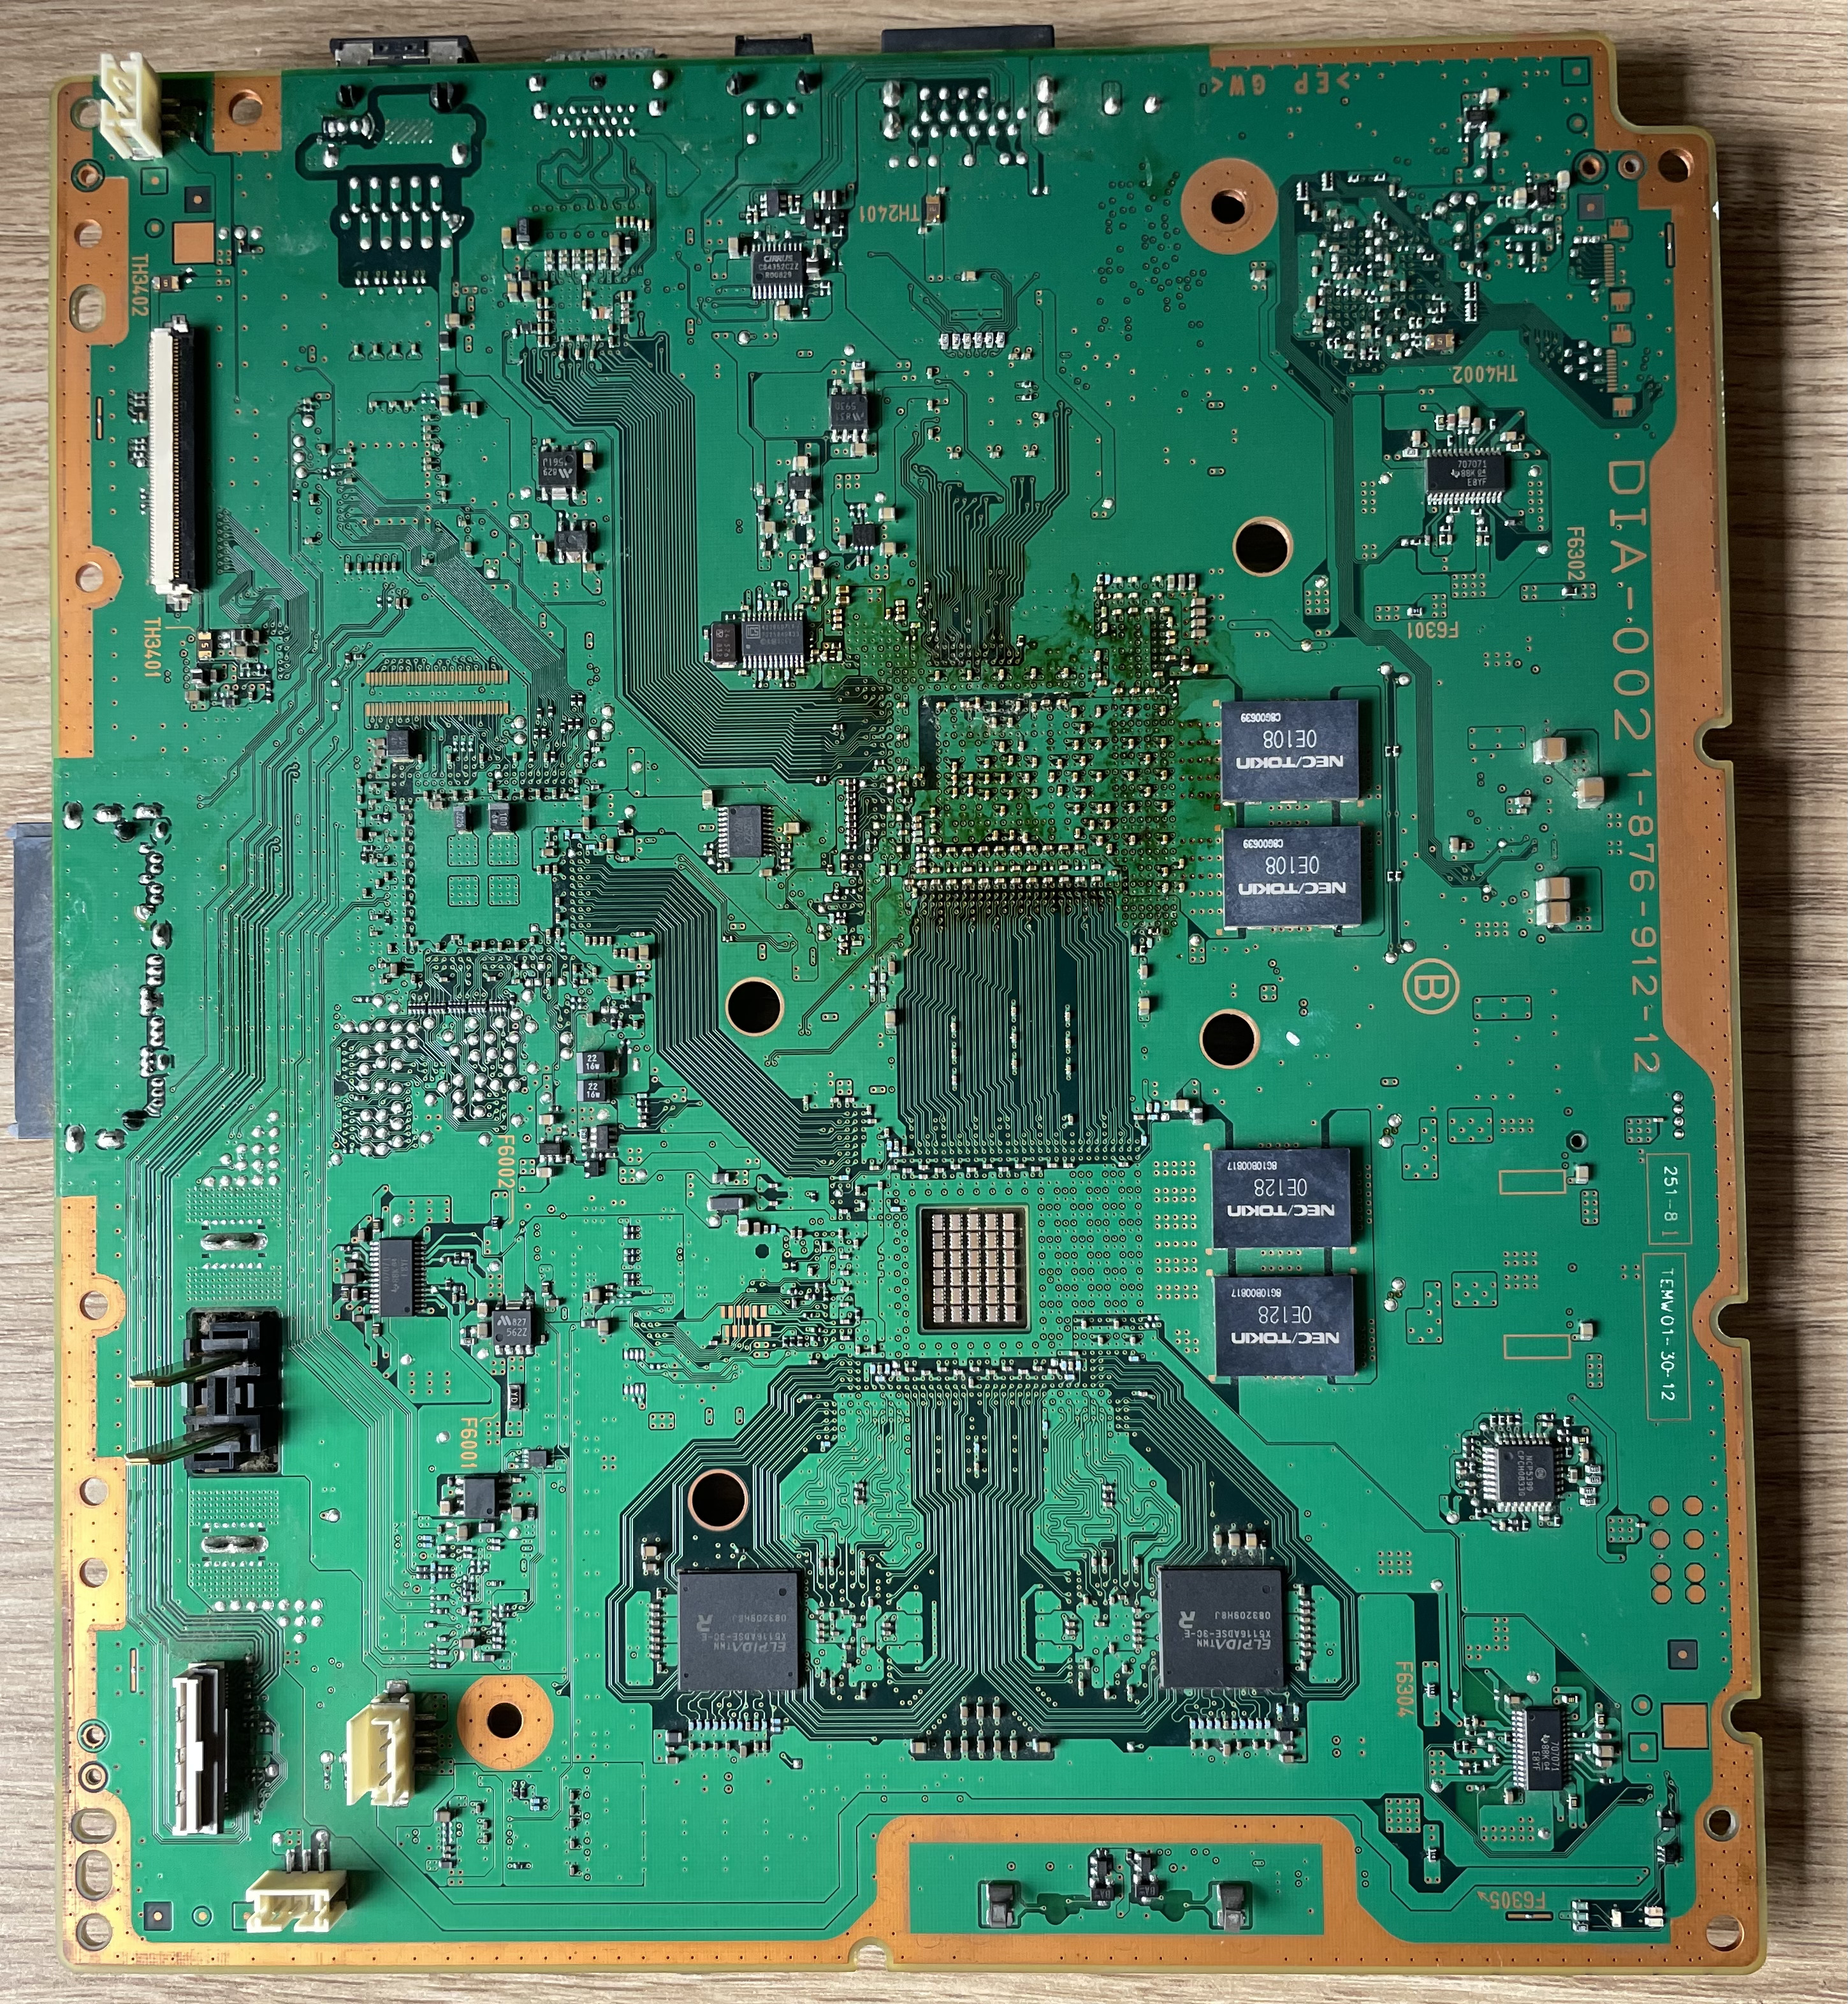
I had this mistake too before in the thread when talking about it... but in his last video i realized his motherboard have integrated the eject/on buttons... so there is no ribbon cable for them, and looks like are responsive when he pressed them

So... since this point it looks that we can forget about the buttons... seems to be working fine
 
Not sure yet, but it looks like :)
The 3 beeps sometimes happens because you have a disc inside the BD drive, not sure if could be that what is causing the 3 beeps
3 beeps is because there is "no disc" inside the bd drive :) (which is true)
Now in my last video i posted i was asking something about those eject/on buttons.
I'm waiting for advice :)
 
After watching your last video, i think the metal shields are displaced, is not normal to be so close to the button terminals
It looks like the shield is displaced 2 or 3 milimeters

Btw i use to name them "metal shields"... but a more correct name is "interference shields"... is like covering the whole circuits with a "layer" of ground
In the same way some antenna cables are covered with a braid of ground to protect them from interferences, in the PS3 is the same but is made "like a sandwich" with one sheet of metal at each side of the motherboard :)

The shields should touch the motherboard at the "golden" borders... all that golden borders of the motherboard are ground
But if for some reason the shield touches anotehr line of the circuit you have a short... is mostly the same than soldering a wire to ground and touching some chips pins with it... nothing good could happen by doing that :P

The good thing is the motherboard/PSU have a protection to identify that kind of shors, and refuses to boot (this is why you had a permanent red led, and was irresponsive to the ON button press)


-----------------------------
No worry about this, is normal
not-cleaned-ps3-motherboard-jpg.19825
 
After watching your last video, i think the metal shields are displaced, is not normal to be so close to the button terminals
It looks like the shield is displaced 2 or 3 milimeters
But how is this possible if the shield is sitting in plastic fittings..
*Correction* is sitting in one plastic fitting and all holes matches the shield
 
The disaligment happens in between the top shield, motherboard, and bottom shield
Are designed to be assembled in between them in a very precise position
And one of the shields neds to be "inserted" in the the holes of other shield (located at the border with the HDMI and other connectors)
After you insert one shield "inside" the other is when you should close them "like a book"

*As said before, this im explaining applyes to PS3 slims... dont remember if hapens in PS3 fats but probably because the goal is to have a perfect assembly in between them, this is needed for all PS3 models so probably even superslims have it
Now i understand what you mean. I'm going to check it out and re place it how it should be and check if theres difference (1 or 2mm).
 
This is a PS3 slim, see this curve along the border of one of the shields ?
CpcfHyh.jpg


The only purpose of that curve is to be used as a reference to assemble the other metal shield with it... so in some way you are "inserting" one shield into the other shield

If you are not sure how are supposed to match with each other... remove the motherboard, keep only the metal shields and do some test trying to assemble them in different ways... you will realize there is one way that is "the good one"... because is the way where you can assemble everything "smoothly" :)
 
This is a PS3 slim, see this curve along the border of one of the shields ?
CpcfHyh.jpg


The only purpose of that curve is to be used as a reference to assemble the other metal shield with it... so in some way you are "inserting" one shield into the other

If you are not sure how are supposed to match with each other... remove the motherboard, keep only the metal shields and do some test with them rtying to assemble them in different ways... you will realize there is one way that is "the good one"... because is the way where you can assemble everything "smoothly" :)
Take a look
 
Not sure, i think you are assembling the shields in incorrect order
The first video you uploaded today when the PS3 was trying to boot when you was moving one of the shields looks like a proof that the problem is related with the shields
 
Not sure, i think you are assembling the shields in incorrect order
The first video you uploaded today when the PS3 was trying to boot when you was moving one of the shields looks like a proof that the problem is related with the shields
The plate i lifted with screwdriver is on the table you can see it at 1:13
There is no other plate i have. You just have the plate that the board is sitting on and then the one can be seen at 1:13 that goes on top of the board whereafter the clamps then the top plastic cover with long screws and 1 small and then the top that slides a bit in with the playstation logo
 
You are keeping one of the shields + heatsink + fan inside the plastic bottom case of the PS3 at all times, and thats a problem

I think the last shield you need to assemble is that one... and the curved border of it "grabs" the other shield from outside
 
First, why not confirm that metal shield is causing problem precisely on those two points on contacts at sensor? Just apply small piece of insulation tape near the two sensors seem to be touching plate. Then power on PS3 without lifting the metal plate.

Regarding misalignment. I think its 1-2 mm of misalignment can happen with slight bending of plate. The plate is not very rigid and firm.
The short circuit is not happening at the buttons, because the buttons detects the "pressed state" by grounding them... and the shield is ground... so incase the button contacts are touching the shield the most that could happen is like keeping both pressed
The short circuit is in another place, and is really hard to imagine where is it

And yeah, it looks like only 1 or 2 miliemters displaced... in one ofhis videos it can be seen the alignment around the buttons (motherboard VS shield), in one of the sides of the rectangled "hole" for the buttons it can be seen some copper but in the other side doesnt
Not sure if that should be visually aligned perfectly though
 
The short circuit is not happening at the buttons, because the buttons detects the "pressed state" by grounding them... and the shield is ground...
I have tested with my multimeter in beep (diode) mode the copper part that actually goes around the whole mobo.
it is ground. I have tested the conduction between the copper and plate and it is ground. Even the plate under the mobo
is ground. But that's when i have my brain in a stuck mode because the eject/on buttons are detected as pressed when ground is presented.
But then the plate is presenting ground to the buttons whole time.. Also i have this phenomen now --> My ps3 is assembled and the eject button works normally and responds whenever i touch it. The On button does not respond,,,,only when the plate is lifted.. I will try some things out. Also i have everything in order and there's no other way my ps3 could be assembled. I can proof that again with a new video if you want
 
I resolved this by bending a bit up the plate so that it does not touch the buttons. The buttons must not be grounded after main power in on.
I think i have bended my plate during several dissasemble procedures.
 

Also look at this picture under, before i cleaned my board with isopropyl few minutes ago before the screwdriver matter...
Why thoes Power/Eject Switches are completely flat? As far as i know they are Z Shaped,not flat, making them Flat,you are touching the EMI Sheild, thus breaking the connection and there is the problem why it isnt working, you are lucky your PS3 hasnt gone berserk,after this stunt, shape them into Z´s,but be carefull not to break them,since this is a integrated switch board. :rolling:
 
The first thing you need to bend is the metal of the buttons, you have them like "smashed", it can be seen in this video:

Compare with this photo, the metal of them does like a "loop"
So you need to restore that loop... but be extremelly carefull while doing it because they can "crack"... or you can pull too much from them and you are going to destroy the copper traces where are soldered
DIA-002_-_1-876-912-22_%28CECHJ%2C_CECHK%29_-_BACK.jpg
 

Similar threads

Back
Top