carr
Member
Sacrifices needs to be made to accomplish win.Yep, amazing when done; however, how many have been done successfully, and how many MB's have been ruined trying to perform this process?
Sent from my SM-G988B using Tapatalk
But this is how it goes. Im Trying to save as many fats as I can. Im glad I've found you guys in this thread. <3
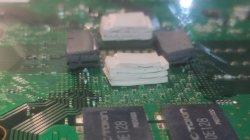
Anyways. The pads are here. So I'll fix the cpu stress press,and see how it goes. But now I need to sit in "school". Lol